Last weekend, we tried something altogether new, and put a dinner party up for sale. We sold twelve tickets, filled twelve seats, and for one magical night, turned our cozy apartment into a warm and charming restaurant. It was a good bit of work – moving all the living room furniture into the bedrooms, setting up a collection of folding tables and chairs, sewing tablecloths from a mix and match of fall-colored fabrics, hanging glowing paper lanterns in wide arcs across the ceiling, pulling out every last piece of china, silver and glassware from the cupboards, borrowing extra wine glasses from our neighbors, arranging the perfect mix of dinner tunes, and filling the room with tiny jars of fresh cut flowers and dozens of twinkling candles. A bit more work than the average dinner party, to say the least. But every last ounce of extra effort was worth it! For this one special night, our newly transformed living room was as warm and lovely, as intimate and inviting, as any restaurant I’ve ever seen. And once it was filled with our guests – talking and laughing, sipping wine and munching on hors d’oeuvres – well, by then it was truly magnificent!
My friend Cary, my sous chef for the night, and a huge talent as both a cook and photographer, shot dozens of wonderful pictures of the lovely scene. And so, thanks to her, I’m able to share a touch of the magic from this special night, a night I’d loved to have shared with all of you.

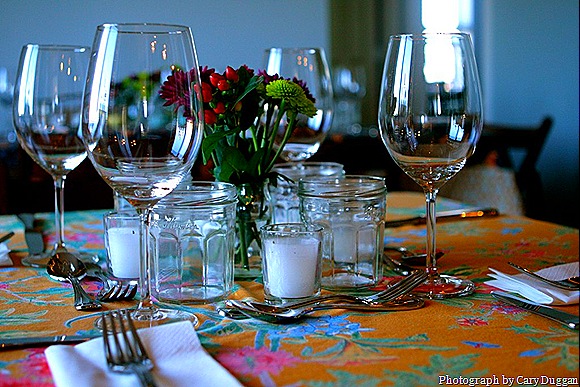

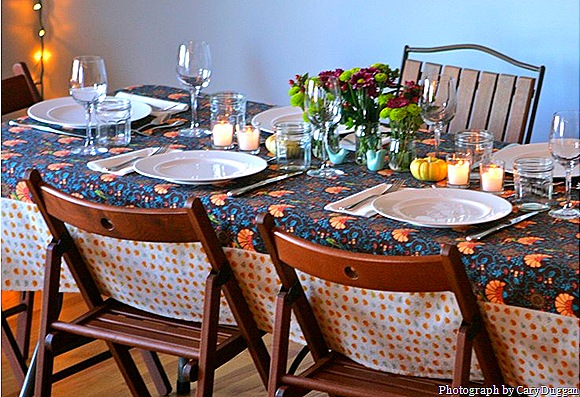

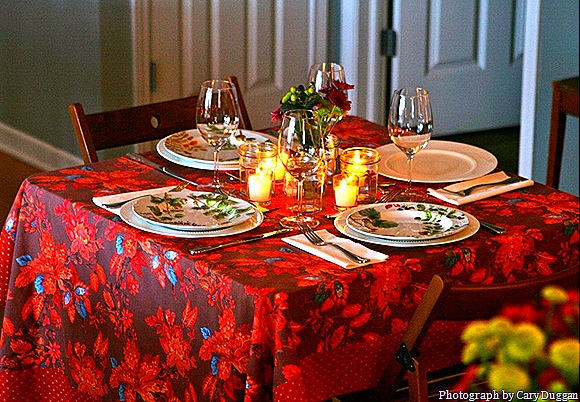
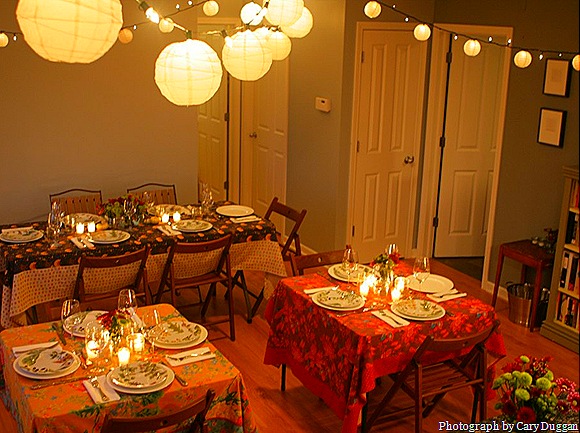

I really do wish that all you readers could have been there with us. But I fret not, and neither should you – After such an incredibly fun and successful night, there are now sure to be many more Scrumptious Company home-restaurant events to come! So stay tuned…
It’s not like me to go on and on about anything but food. In fact, with a dinner party to throw every single week, I’ve hardly had the time, money or energy to spend on things like table settings, lighting, music and flowers. A rare exception, this singular event allowed me to relish in the decorating, get absorbed in the atmosphere, and celebrate the ambience.
But now, seriously, it’s time to talk food!
| An Early Thanksgiving Feast
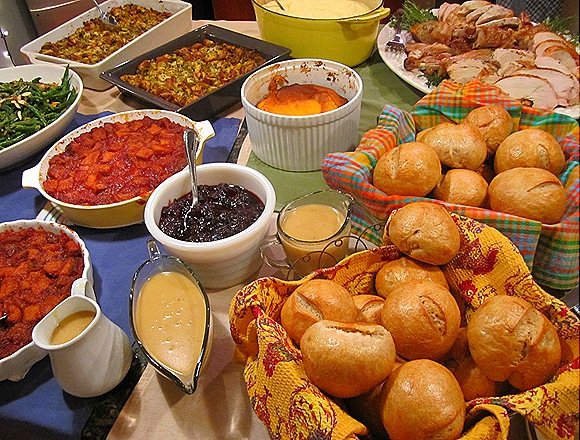
A Selection of Artisanal Cheeses French Bread Crostini Grapes Clusters & Sliced Pears Sugar-Spiced Mixed Nuts Herb-Roasted Turkey Traditional Thanksgiving Stuffing with Fresh Herbs Creamy Mashed Yukon Gold Potatoes Butternut Squash Soufflé Green Beans with Toasted Almonds & Caramelized Shallots Caramelized Tomato Pudding Cranberry Sauce with Tart Dried Cherries Turkey Gravy Warm Dinner Rolls Pumpkin Cheesecake with Brown Sugar-Bourb0n Whipped Cream Dark Chocolate Tart with Toasted Almonds & Candied Orange |
An Early Thanksgiving Feast. One that gave me the chance to personally cook my favorite annual meal. Back home in Toledo, Thanksgiving dinner is always my mom’s domain. And after years of fixing this incredible meal for a huge list of aunts, uncles, grandparents and cousins, she’s such a pro at it – working so fast and seamlessly, with hardly any apparent effort – well, she’s so good, there’s never anything left for me to help with by the time we pull up the drive. Not that I’m complaining. My mom puts out such a fabulous holiday spread, I’d be foolish to intervene! But aside from giving me the opportunity to cook this once-a-year feast for myself, this early extra dinner also allows me to share with you my favorite holiday recipes, a couple weeks before you set out cook Thanksgiving feasts of your own. Some of the recipes are all-together classic and steeped in family tradition, while others are a little newish, with a bit of a twist. And all were huge successes. I hope you try some of them yourselves this year. I’d sincerely love it if you did! And I wish you all the happy success we shared this night.
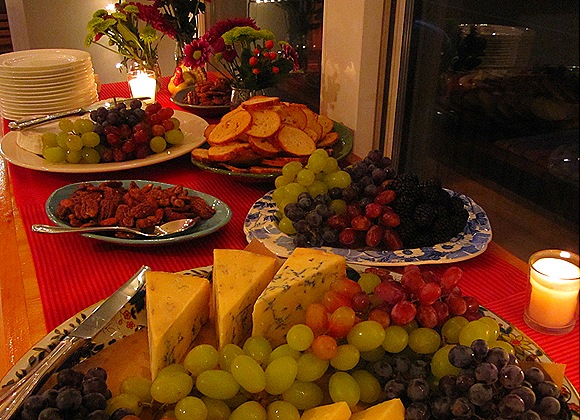
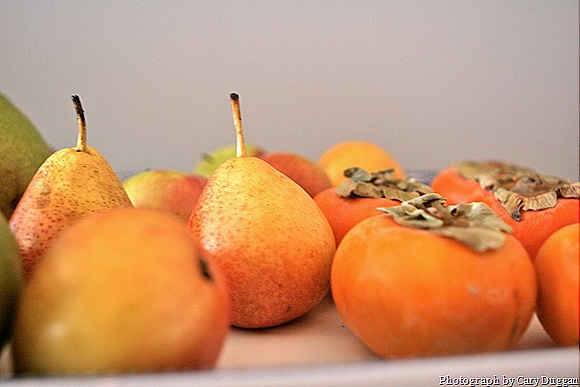
I’ve never been one for nibbling, leading up to Thanksgiving supper. I like to save plenty of room for all the turkey and other fixings. But one can’t deny the handiness of hors d’oeuvres, for keeping the guests happy and satisfied, while putting the final touches on dinner. And so, I set out a simple-as-possible spread – a selection of cheeses, toasted crostini, sliced pears, clusters of grapes and bowls of sugar-spiced mixed nuts – just the thing to whet the palette while making the way for the main event.
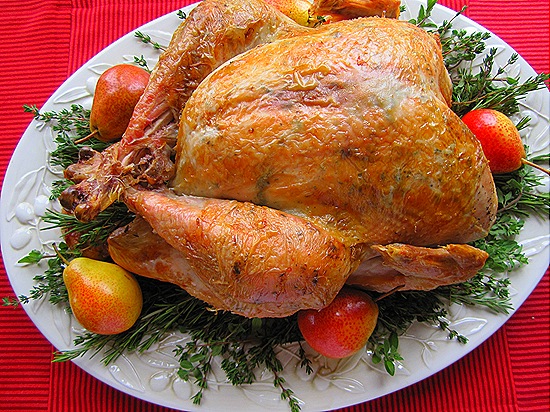
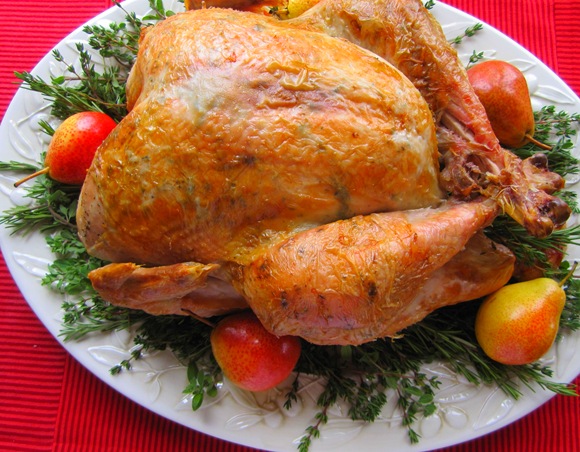
Now onto the main course. And I suppose, the only place to start is with the turkey. This golden bird was everything a gobbler should be – with moist and tender meat, full turkey flavor, subtle hints of rosemary, thyme and sage in every bite, and crisp, crackly, butter-basted skin. An wow, wasn’t she a beauty!?
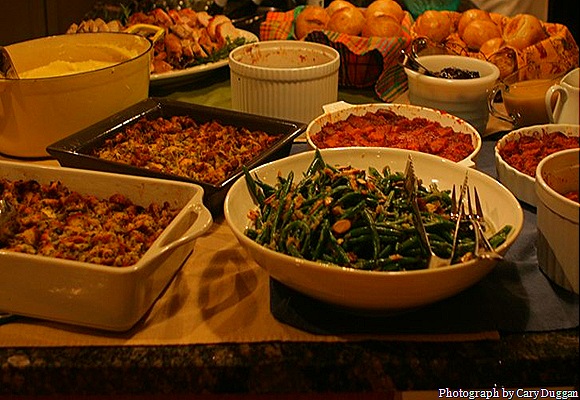
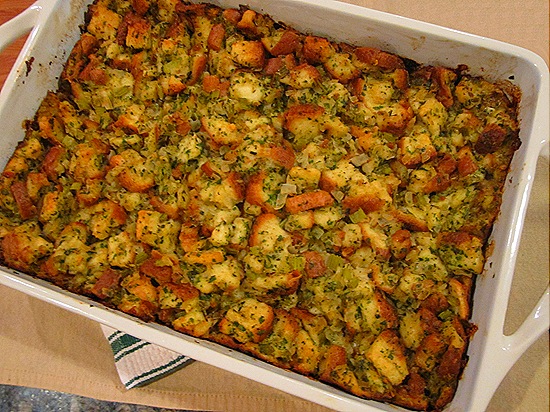
The most traditional of Thanksgiving sides? I’d have to say that’s stuffing. Classic as can be. Ironically though, stuffing is also the holiday side with the widest range of preparation possibilities. There are a hundred and one variations on the theme of stuffing – chestnut, cornbread, oyster, walnut, sausage, dried fruit, chicken liver – the diverse list goes on and on. But what’s the best of all these variations? Well, that depends on who you’re asking, and on what type of stuffing their mom has always made. Because it’s a universal truth that everyone’s favorite stuffing is their mother’s. My mom’s stuffing was always a pretty traditional interpretation of this most traditional dish – tender baked cubes of white bread steeped in rich chicken stock, with lots of onions, even more celery and handfuls of fresh, fragrant herbs. I’ve played around before with all the fancy alternatives, but to me, a simple herb stuffing will always be the best. And the recipe below is one of the best you’ll find for just that!
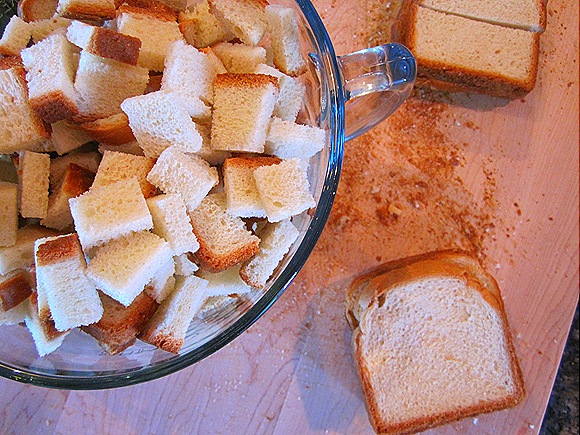
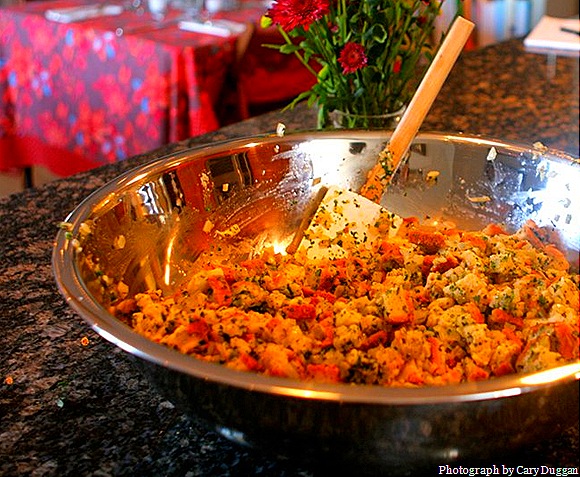
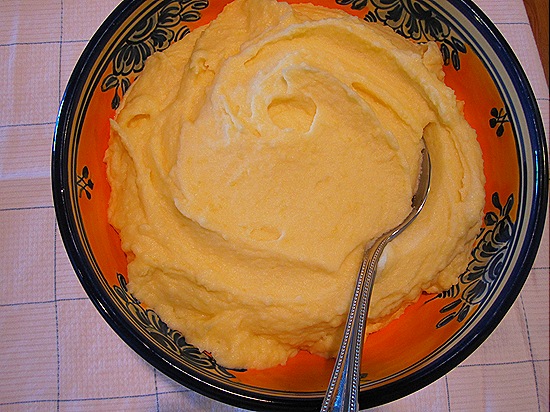
And while we’re on the subject of traditional sides, let’s talk about mashed potatoes. Again, this dish is one that can be interpreted a million different ways. But I thought I’d take the opportunity to share with you my favorite way of making basic mashed potatoes. The recipe below is for nothing fancy at all – just rich, buttery, creamy, fluffy, velvety, smooth mashed potatoes. Basic mashed potatoes. Utterly perfect basic mashed potatoes.
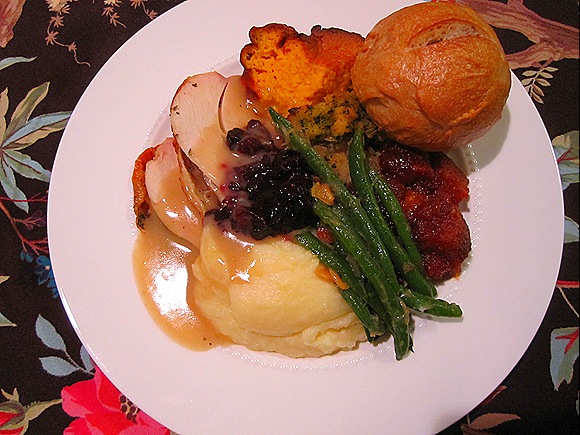
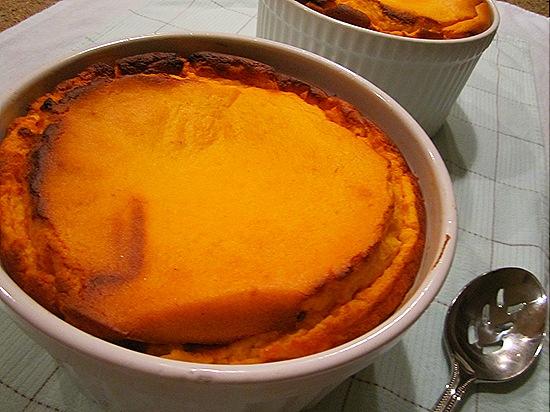
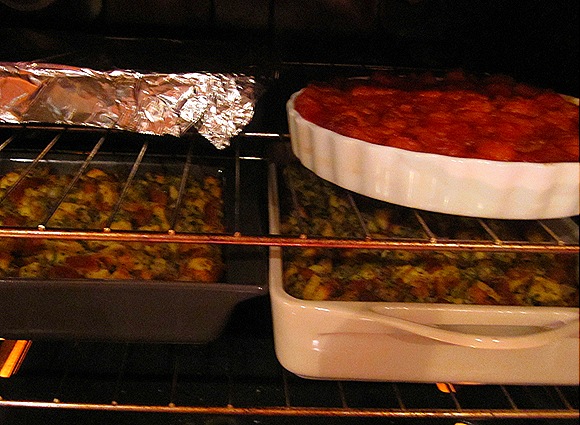
On my mom’s Thanksgiving buffet always sits a vibrant orange dish of velvety butternut squash puree. To twist this a little, I decided on a butternut soufflé. Light and impossibly airy, yet rich with the full, deep flavors of sweet roasted squash and nutty gruyere cheese. And while the flavor boasts all the singular deliciousness of butternut squash, it’s the texture that really sets this dish apart. So tender and fluffy, one can’t help but think of clouds, huge cumulus clouds at sunset, glowing a deep, vivid orange, with shadowy edges of gold.
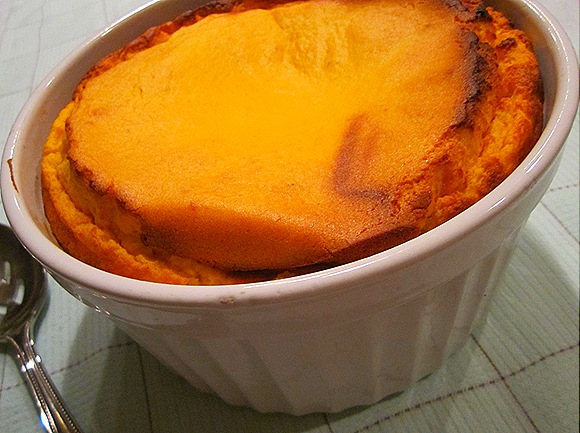
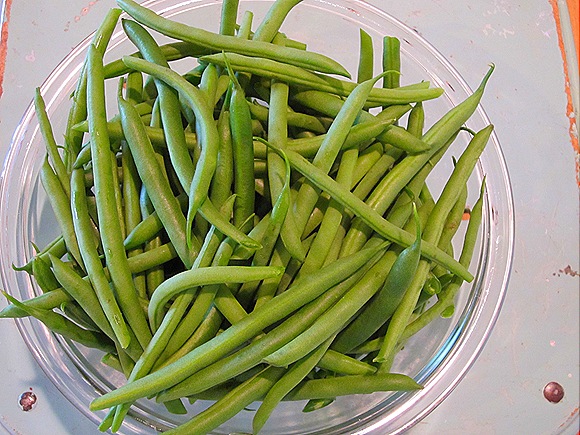
Next on the menu, green beans. Fresh, bright green beans tender yet crisp, cooked in a flash, in a big pot of boiling water, then folded in a buttery sauce of sweet, caramelized shallots, with a dash of floral thyme and a crunchy bite of toasted slivered almonds. Needless to say, this is worlds away from the sad and mushy concoction of all-too-traditional green bean casserole.
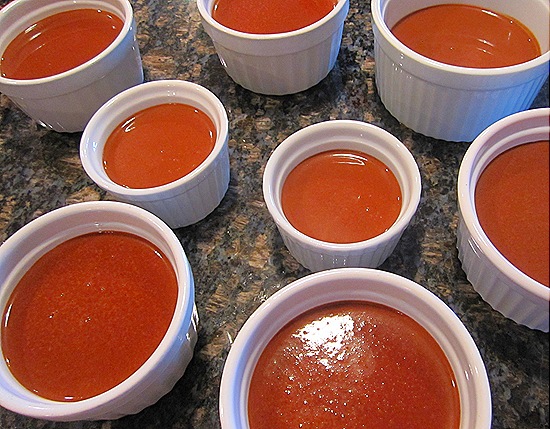
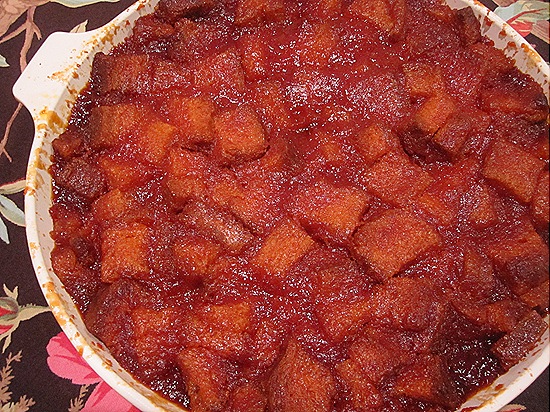
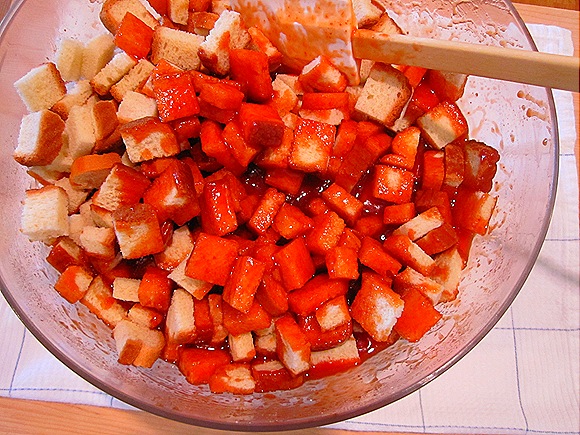
I’m so excited to tell you about this caramelized tomato pudding. It’s an old family recipe, a dish that always finds a place on our holiday table. And it’s so completely delicious, I’m surprised it hasn’t yet found it’s way into every Turkey Day spread across the country. Once you try this sensational dish you’ll wonder why it’s not as classically Thanksgiving as mashed potatoes, stuffing or the turkey itself. A sticky pudding of nothing more than bread, butter, brown sugar and tomato puree, it’s simply superb. A beautiful shade of burnt red, it’s deeply savory at a just-right level of sweet, with a rich, complex taste, ironically not at all reminiscent of tomato. It’s tender and light, but chewy at its caramelized edges. One try and you’ll be hooked, just like every single guest at our dinner party.
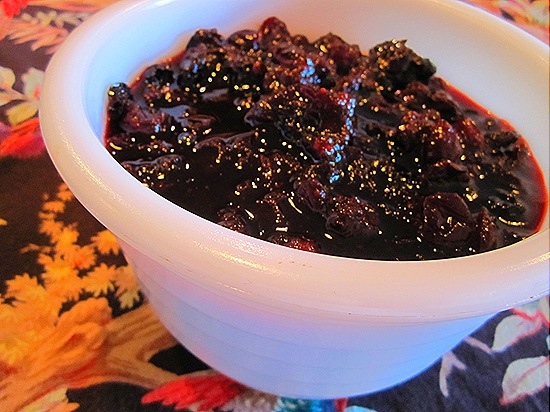
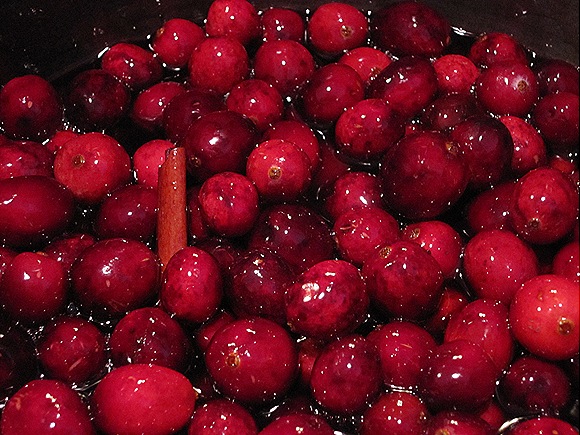
We were never a cranberry sauce family. In fact, I don’t recall a single family holiday that ever sported this sweet red stuff. Because thanks to the tomato pudding, we have a sweet red stuff of our own. So we never really missed it. But still, in keeping with traditional tradition, I thought I might want to include some cranberry sauce tonight. And the recipe I tried was such a delicious success – and incredible mixture of plump, fresh cranberries and tart, chewy dried cherries, with warm tones of cinnamon and allspice, and just a hint of brown sugar sweetness - I can’t see myself not making it again and again in the Thanksgivings to come.
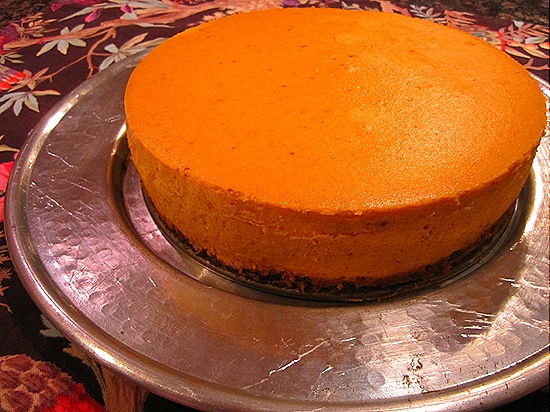
And finally, dessert. Or should I say, desserts. The first dessert, pumpkin cheesecake. This cake was incredibly creamy, utterly delicious, and near all-around perfect. Atop a crumbly graham cracker crust sits a smooth, cool custard of deep pumpkin flavor and warm spices. Better than pumpkin pie, and at the same time better than ordinary cheesecake. I’m making it again in two weeks, and bringing it with us to Toledo. And oh! I nearly forgot about the whipped cream. Brown-sugar bourbon whipped cream that is, with sour cream too. Thick and rich and intoxicating, it really is simply amazing, and a perfect top to this perfect cheesecake!

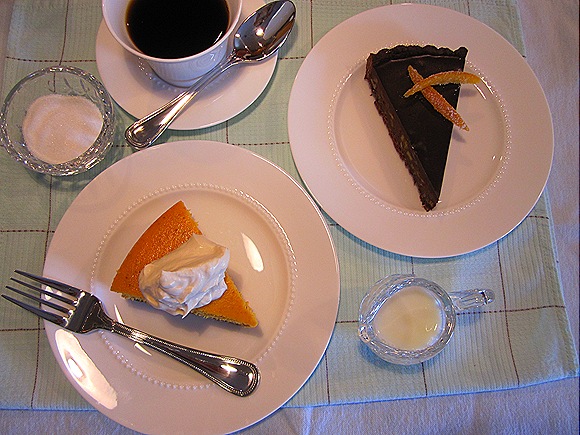
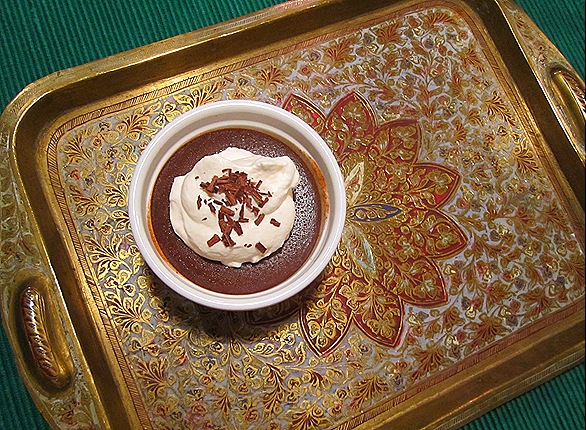
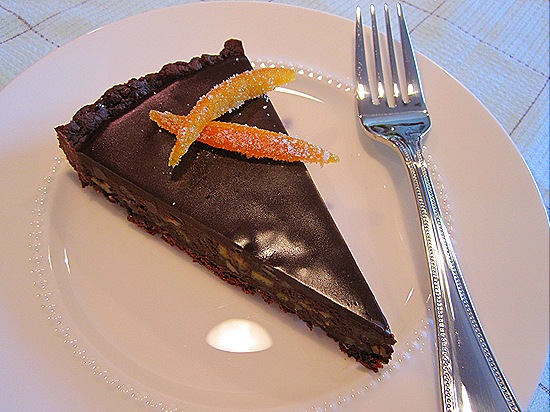
And just because one dessert selection is never enough for Thanksgiving… a dark chocolate tart with toasted almonds and candied orange. Intense, smooth chocolate ganache studded with crunchy bits of toasted almonds and tender, bright specks of candied orange peel, inside a thin, crisp chocolate crust. Extreme chocolate flavor, tempered by tart orange and subtly sweet almonds, and a big, cool dollop of lightly sweetened whipped cream. With a hot cup of coffee, it’s nothing by pure bliss. Ah, what a lovely way to end a wonderful night!
|
French Bread Crostini
This recipe is a repeat from a previous dinner party. (It’s that good!) Check it out here. 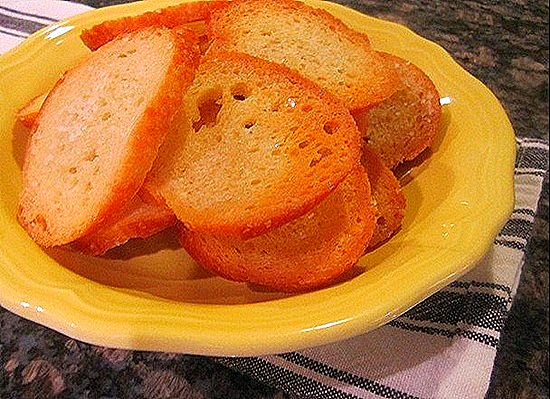
|
|
Sugar-Spiced Nuts
This recipe is a repeat from a previous dinner party. (It’s that good!) Check it out here. 
|
|
Herb-Roasted Turkey
Serves 8 to 10, with left-overs :) No matter how deft your knife skills, carving a turkey is an inevitably messy job, one I’d highly recommend taking care of before your guests even arrive. Taking a trick from up my mom’s clever sleeve, I’ve gotten in the habit of roasting and carving my turkey a whole day before Thanksgiving, then reheating it just before dinner. It may sound like a bit of a cheat, but I promise no quality is sacrificed, and with an oven full of a million and one sides, you’re going to be glad the carving is over and done with, come the big night! 1 12- to 14-pound turkey
1 stick butter, room temperature
1 Tbl finely chopped fresh rosemary
1 Tbl finely chopped fresh thyme
1 Tbl finely chopped fresh sage
1 tsp kosher salt, plus more for seasoning the turkey
1/4 tsp freshly ground black pepper, plus more for seasoning the turkey
1/2 cup chicken stock, for re-heating Pre-heat the oven to 35o°F, and arrange the rack in the bottom third position. In a small mixing bowl, combine the butter with the rosemary, thyme, sage, salt and pepper. Stir with a rubber spatula to thoroughly blend. Remove the turkey neck and giblets, and reserve for making the gravy. Rinse the bird well, inside and out, then pat dry with paper towels. Generously salt and pepper the inside of the cavity. Gently slide your hands under the skin of the turkey breast and thighs, to loosen it. Using just half of the herbed butter, use your hands to smear it beneath the skin over the meat of the turkey breasts and thighs. Generously season the outside of the bird with salt and pepper. Tuck the wings behind the back, then tie the tips of the legs together using butchers twine. Place the turkey on a roasting rack set inside a roasting pan. Pour about a cup of water into the roasting pan (to prevent the drippings from burning.) Melt the remaining herb butter, then generously brush the entire bird with about a tablespoon or so of the butter. Roast, basting with butter every hour or so, and adding more water to the pan as necessary, until the internal temperature of the breast meat is 140°F, 2 to 3 hours. (I highly recommend using a leave-in thermometer such as this one.) Increase the oven temperature to 425°F, baste a final time with butter, and continue to roast until the internal temperature of the breast meat is 165°F and that of the thigh meat is 175°F, about 30 to 45 minutes longer. Transfer the turkey to a carving board and let stand 30 minutes before slicing. To carve the turkey: - To remove the legs from the bird, arrange the turkey with the breast facing upwards and away from you. Slice through the loose skin between the leg and the breast. Pull the entire leg down towards the carving board, until the hip joint between the leg and the breast is exposed. Slice between this joint, cutting through the meat and skin as close as possible to the edge of the thigh meat. Repeat with the other leg.
- To separate the thighs from the drumsticks, cut between the joint that connects the two. Leave the drumsticks whole. Slice the thigh meat from around the bone, then cut into serving-size slices.
- Remove the wings from the bird by slicing through the wing joints.
- To remove the breast meat, slice along both sides of the breastbone, then angle the knife even with the rib cage, and slice between the meat and the bones. Place the removed breast on the carving board and slice the meat cross-wise (against the grain) into serving-size slices. Repeat with the other breast.
- If you’re feeling industrious, save the carcass for making turkey stock later :).
The turkey meat can be kept refrigerated in an air-tight container until the next day. In order to re-heat, arrange the sliced meat into one or two casserole dishes, making sure not to pack the slices too closely together. Drizzle the meat with about 1/2 cup chicken stock, then cover the casserole dishes with foil and place in a 35o°F oven. It should take about 20-30 minutes for the meat to re-heat. Arrange the sliced turkey meat on a platter and serve immediately. |
|
Traditional Thanksgiving Stuffing with Fresh Herbs Serves 8 to 10
 enough white bread to make 10 cups of 1/2-inch cubes (about 2 loafs, give or take)
(I like Pepperidge Farm’s original white bread)
1 Tbl plus 10 Tbl plus 4 Tbl butter, divided
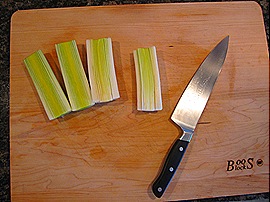
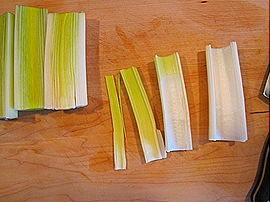
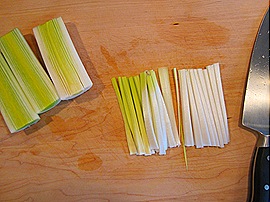
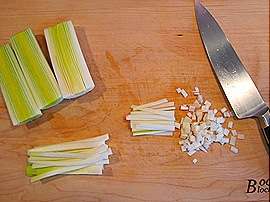
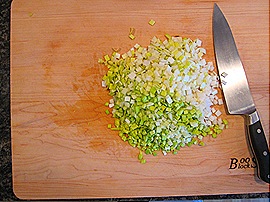
6 ribs celery, washed and finely chopped
2 medium yellow onions, peeled and finely chopped
1 bay leaf
1 Tbl finely chopped fresh sage
2 tsp finely chopped fresh marjoram
2 tsp finely chopped fresh savory
2 tsp finely chopped fresh thyme
1/2 tsp grated nutmeg
1/2 cup finely chopped fresh parsley
2 eggs, beaten
3 cups chicken stock (I really like Swanson’s Free Range Organic Chicken Broth)
kosher salt & freshly ground black pepper, to taste
Preheat the oven to 350°F. Line a sheet pan with a single layer of bread slices. Bake for about 7 minutes then flip over and bake for another 7 or so minutes, until the bread feels firm and dry, like it’s stale. Allow the bread to rest for a few minutes at room temperature, to cool down a bit, then slice into 1/2-inch cubes. Repeat until you have 10 cups of cubed bread. 
Increase the oven temperature to 400°F. Grease a 9 x 13-inch casserole dish with 1 Tbl butter. Set aside. Melt 10 Tbl butter over medium-high heat in a large sauté pan. Add the celery, onions and bay leaf. Season to taste with salt and pepper, then cook, stirring occasionally, until golden brown, about 15-2o minutes. Add the sage, marjoram, savory, thyme and nutmeg. Cook, stirring occasionally, until fragrant, about 2 minutes. Discard the bay leaf, and transfer the mixture to a large mixing bowl. Add the parsley and stir to combine. Add the cubed bread and toss well to combine. Drizzle evenly with the chicken stock and toss well to combine. Add the beaten eggs and toss well to combine. Allow the mixture to stand at room temperature about 15 minutes, stirring occasionally, in order for the bread to soak up some of the juices. 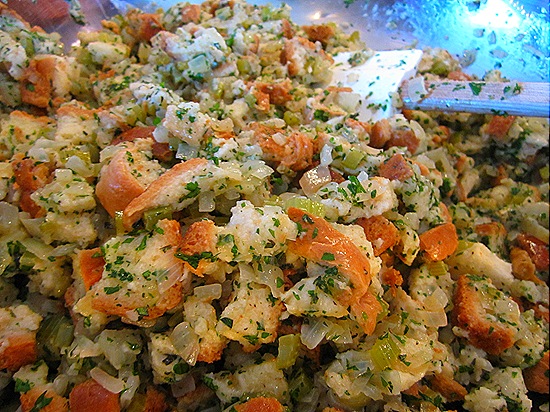
Transfer the mixture to the buttered casserole dish, spreading it evenly across the dish. Dot the top with the remaining 4 Tbl butter. Cover with foil. Bake 30 minutes, then uncover and continue to bake until deep golden brown on top, about 20 minutes more. Remove from the oven and allow to rest about 10 minutes before serving. |
|
Creamy Mashed Yukon Gold Potatoes Serves 8 to 10 4 pounds Yukon Gold potatoes
1 cup heavy cream, warmed
1/2 cup whole milk, warmed
1 1/2 sticks (12 Tbl) butter, cut into small pieces
kosher salt & freshly ground black pepper, to taste Rinse the potatoes in cool water. Peel the potatoes, then cut into medium-sized chunks. Add to a pot of boiling salted water and cook until tender. When the potatoes are tender, drain them in a colander, then press the cooked potatoes through a potato ricer or food mill set over a large mixing bowl. Fold the butter into the potatoes, then fold in the cream. Season with a good pinch of salt and pepper. Mix gently to combine. Serve hot. The mashed potatoes can be made a day ahead and re-heated over medium-low heat in a large pot. Add milk as needed to moisten the potatoes, and be sure to stir frequently. |
|
Butternut Squash Soufflé Serves 8 to 10 as a side 1 large butternut squash (about 1 pound)
about 1 tsp extra-virgin olive oil
3 Tbl butter, plus more for greasing the dish
3 Tbl all-purpose flour
1 1/2 cups whole milk, warmed
kosher salt & freshly ground black pepper, to taste
1 cup coarsely grated Gruyere cheese
1 Tbl light brown sugar
1/4 tsp cayenne pepper
3/4 tsp grated nutmeg
3 large egg yolks
4 large egg whites
kosher salt & freshly ground black pepper, to taste First, roast and puree the butternut squash: Preheat the oven to 350°F. Cut the butternut squash in half lengthwise, scoop out the seeds, drizzle the insides with olive oil and sprinkle with a good pinch of salt and a few grinds of pepper. Place cut side-down on a parchment-lined baking sheet. Cover tightly with foil, and roast until completely tender, about an hour to an hour and a half. Remove from the oven, and when cool enough to handle, scoop out the tender flesh and discard the skins. Place the butternut flesh in the bowl of an electric food processor, and process until very smooth. Using a kitchen scale, weigh out 12 ounces of the pureed squash. You’ll have a little left over, which, with a little added butter and brown sugar, will make for a tasty snack or side.
You can roast and puree the squash a day ahead, and keep refrigerated in an air-tight container. In fact, I’d definitely advise it!
Now, proceed with the soufflé: Pre-heat the oven to 425°F, and arrange a rack in the middle position. Generously butter a 2- or 3-quart shallow ceramic or glass baking dish. Melt the butter in a medium-sized saucepot set over medium heat. Add the flour and whisk to combine. Cook, whisking constantly, for 2 minutes. Add the milk, a little at a time, and whisking as you pour. Bring to a boil, then lower the heat to maintain a simmer. Simmer, whisking occasionally, until thickened, about 5 minutes. Add the pureed squash, grated cheese, brown sugar, cayenne and nutmeg. Season with a big pinch (almost a teaspoon full) of kosher salt and a good pinch of pepper, then whisk to combine. Place the egg yolks in a large mixing bowl and whisk. Add about a cup of the squash mixture and immediately whisk to combine. (If you don’t do this immediately, the hot squash mixture will start to cook the egg.) Whisk in about another cup of squash mixture, then add the remaining squash mixture to the yolks and whisk to combine. Set aside. Combine the egg whites with a pinch of salt in the bowl of an electric stand mixer fitter with the whisk attachment. Beat on medium-high speed until the whites just hold stiff peaks. Fold a quarter of the whites into the squash mixture with a rubber spatula. Then fold in the remaining whites, working gently but thoroughly. Pour the mixture into the buttered baking dish. Bake, uncovered, for 15 minutes. Then loosely cover with foil (just drape it over the dish) and bake until puffed, golden brown and just set, about 30 minutes. Serve immediately. |
| |
|
Green Beans with Toasted Almonds & Caramelized Shallots Serves 8 to 10 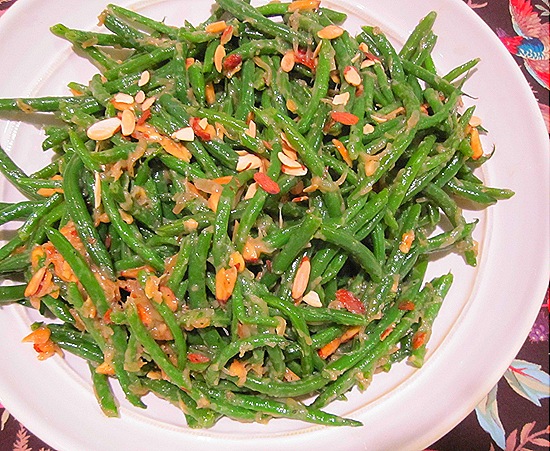
3 pounds green beans, stem ends trimmed
1/2 cup sliced almonds, skin on
1/2 stick (4 Tbl) plus 1/4 stick (2 Tbl) butter, divided
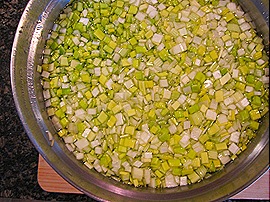
8 large shallots, peeled and thinly sliced
1 Tbl fresh thyme, chopped
kosher slat & freshly ground black pepper, to taste
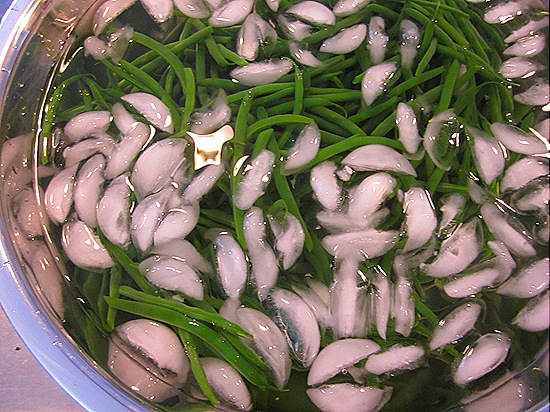
“Blanch & shock” the green beans: Bring a large pot of salted water to a boil. Add the green beans and boil, uncovered, until tender, about 4-5 minutes. Drain in a colander then plunge into a large bowl of ice water. When cool, drain again in a colander and set aside. 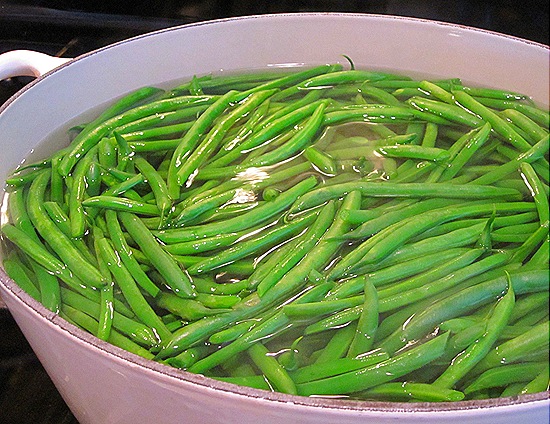
Toast the almonds: Preheat the oven to 350°F, line a baking pan with parchment paper and spread the slivered almonds across the paper. Toast for five minutes, turn the pan, and continue to toast until you can smell the nice nutty aroma and the color of the nuts has deepened a bit, about 10-15 minutes total. Remove from the oven and set the almonds aside until needed. Caramelize the shallots: Melt 4 Tbl butter over medium heat in a large sauté pan. Add the sliced shallots. Season with salt and pepper and stir to combine. Reduce the heat to medium-low (or even low, depending on the strength of your burner) and cook, stirring frequently for the first 15 minutes, and then only occasionally, about every 15-20 minutes, until the shallots are a lovely golden color, about 1 1/2 to 2 hours. Once finished, transfer the caramelized shallots to a small bowl and reserve until needed. (Patience is key here. And while this does take a lot of time, it happily does not require a lot of work or attention. Remember, slow and low will give you the best results. You don’t want to brown the shallots right away, but let them slowly turn golden. So adjust your stovetop temperature accordingly.) All of these steps can be completed a day ahead. The rest can be done just before serving. Now, put it all together: Right when you’re about ready to serve dinner, return the large,
cleaned and dried sauté pan to the stove top. Melt the remaining 2 Tbl butter over medium-high heat. Add the caramelized shallots and the thyme and cook, stirring frequently, until the shallots are heated though, about 2 minutes. Add the green beans, seasoning with salt and pepper to taste. Cook, stirring frequently, until heated through, about 3 to 4 minutes. Add the toasted almonds and stir to combine. Transfer to a platter and serve immediately. |
|
Caramelized Tomato Pudding Adapted from an old family recipe Serves 8-10 9 slices good-quality white bread (I like Pepperidge Farm’s original white bread)
2 1/4 cups light brown sugar
2 sticks (1/2 pound) butter, melted
14 oz canned tomato puree Preheat the oven to 350°F. Generously butter a 2-quart casserole dish and set aside. Line a sheet pan with a single layer of bread slices. Bake for about 7 minutes then flip over and bake for another 7 or so minutes, until the bread feels firm and dry, like it’s stale. Allow the bread to rest for a few minutes at room temperature, to cool down a bit, then slice into 1/2-inch cubes. In a large mixing bowl, stir to combine the brown sugar, butter and tomato puree. Add the cubed bread and stir to combine. Allow the mixture to stand at room temperature about 15 minutes, in order for the bread to soak up some of the sauce, then pour into the buttered dish. At this point, the dish can be covered with plastic wrap and refrigerated until ready to bake, up to 12 hours. (Of course, you can always go straight to the baking step.) If refrigerating, allow the dish to sit at room temperature for at least 1 hour before baking. Bake, uncovered, until puffed, golden brown on top, and caramelized at the edges, about 45 minutes. Remove from the oven and allow to rest about 10 minutes before serving. |
|
Cranberry Sauce with Tart Dried Cherries Makes about 4 cups 1 12-oz container frozen cranberry juice cocktail concentrate, thawed
1 cup water
1 cup light brown sugar
1 cinnamon stick
1/4 tsp ground allspice
6 oz dried tart cherries
12 oz fresh cranberries Combine the cranberry juice concentrate, water, brown sugar, cinnamon stick and allspice in a medium-sized saucepot. Bring to a boil over medium-high heat, stirring until the sugar dissolves. When the mixture boils, reduce the heat to medium and add the cherries. Cook for 2 minutes, stirring occasionally, then add the cranberries. Cook until the cranberries pop, stirring occasionally, about 10 minutes. Transfer to bowl, and allow to come to room temperature. Then cover and refrigerate overnight. Can be made 1 week ahead and kept refrigerated in an air-tight container. Serve cold or at room temperature. |
|
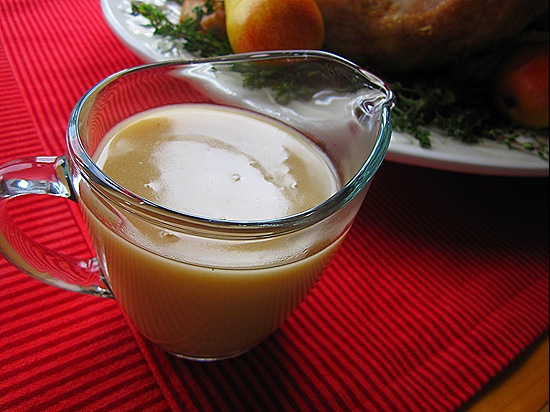
Turkey Gravy Makes about 3 cups
For this gravy, you first must make a turkey stock using the necks and giblets of your roasting turkey. It’s best to make the stock while your bird roasts. Then, you’ll use the fat from the pan drippings to make the gravy. I’m the kind of person who likes to drench absolutely everything on my Thanksgiving plate in gravy. If you’ve got more than one like me at your table, I’d advise doubling this recipe at least. To do this, and to do it without roasting another turkey, you’ll need more fat, so use 1/4 cup butter. And make sure to buy some extra turkey necks and giblets, which is easy to do at most grocery stores.
 1 Tbl vegetable oil
reserved turkey neck and giblets from 1 turkey
1 large yellow onion, peeled and chopped
3 cups chicken stock (I really like Swanson’s Free Range Organic Chicken Broth)
6 cups water
1 bay leaf
6 sprigs fresh thyme
1/4 cup liquid fat from turkey drippings
6 Tbl all-purpose flour
kosher salt & freshly ground black pepper, to taste Heat the oil for about 2 minutes over medium-high heat in a large saucepot or Dutch oven.
Add the turkey neck and giblets and cook, turning as needed, until browned on all sides, about 7 to 10 minutes. Add the onion and cook, stirring occasionally, until lightly browned, about 5 to 7 minutes. Add the chicken stock, water, bay leaf and thyme. Bring to a boil, then reduce the heat to low and keep at a bare simmer until reduced by half, about 3 hours. Strain the stock, discarding the solids. Meanwhile, after the turkey is done roasting, strain the pan drippings into a measuring cup. Let the liquid settle so that the fat separates from the juices, then skim off the top layer of fat. You should have about 1/4 cup fat. Reserve the fat, and add the de-fatted juices to the stock. Heat the reserved fat in the saucepot over medium heat for 1 minute. Whisk in the flour and cook, stirring constantly, until lightly golden and fragrant, about 3 minutes. Whisk in about a third of the warm stock, whisking until smooth. Whisk in half of the remaining stock and whisk until smooth. Whisk in the rest of the stock and whisk until smooth. (Slowly whisking in the stock like this, and whisking in between additions, will insure a smooth gravy. So will using warm stock instead of cold.) Reduce the heat to low and gently simmer until thickened, about 10 minutes. Taste and season as needed with salt & pepper. |
|
Pumpkin Cheesecake Serves 12 to 16 For the crust:
9 graham crackers (5 oz), broken into large pieces
3 Tbl sugar
1/2 tsp ground ginger
1/2 tsp ground cinnamon
1/4 tsp ground cloves
6 Tbl unsalted butter, melted, plus more for greasing the pan For the filling:
1 15-oz can pumpkin puree
1 1/3 cups sugar
1 tsp ground cinnamon
1/2 tsp ground ginger
1/4 tsp grated nutmeg
1/4 tsp ground cloves
1/4 tsp ground allspice
1/2 tsp salt
1 1/2 pounds (3 8-oz packages) cream cheese, room temperature
1 Tbl vanilla extract
1 Tbl fresh lemon juice (from 1 lemon)
5 large eggs, room temperature
1 cup heavy cream For the whipped cream:
1 cup heavy whipping cream
1/2 cup sour cream
1/3 cup light brown sugar
pinch kosher salt
2 tsp bourbon For the crust: Pre-heat the oven to 325°F. Arrange a rack in the lower-middle position.
Generously butter the bottom and sides of a 9-inch spring-form cake pan and set aside. Combine the graham crackers, sugar, ginger, cinnamon and cloves in the bowl of an electric food processor. Pulse until finely ground, about fifteen 2-second pulses. Transfer the crumb mixture to a medium-sized mixing bowl, add the melted butter, then mix with a rubber spatula to evenly moisten. Transfer the crumb mixture to the buttered cake pan and spread into an even layer. Using your fingers and the heels of your hand, press the crumbs evenly into the bottom of the pan. Bake until browned around the edges and fragrant, about 15 minutes. Cool to room temperature on a wire rack, about 30 minutes. When cool, wrap the outside of the pan with four layers of foil (to protect the cake from the water bath), then set the cake pan in a large roasting pan. For the filling: Bring about 4 quarts of water to a boil. Meanwhile, in order to drain some of the water from the pumpkin puree, lay a triple layer of paper towels, two sections of towel per layer, on a clean surface. Evenly spread the pumpkin puree over the towels with a rubber spatula, the cover the pumpkin with a second triple layer of paper towels. Press firmly until the paper towels are saturated with water. Reserve the pumpkin puree, discarding the towels. Whisk together the sugar, cinnamon, ginger, nutmeg, cloves, allspice and salt in a small mixing bowl, then set aside. Place the cream cheese in the bowl of an electric stand mixer fitter with the paddle attachment. Beat at medium speed to soften slightly, about 1 minute. Scrape the paddle and the bottom and sides of the bowl with a rubber spatula. Add about one-third of the sugar mixture to the cream cheese and beat at medium-low speed until combined, about 1 minute. Scrape the bowl and, in two additions, add the remaining sugar mixture, scraping the bowl after each addition. Add the pumpkin, vanilla and lemon juice and beat at medium speed until combined, about 1 minute, then scrape the bowl again. Add 3 eggs and beat at medium-low speed until incorporated, about 1 minute, then scrape the bowl. Add the remaining eggs and again beat at medium-low speed until incorporated, about 1 minutes, again scraping the bowl. Add the heavy cream and beat at low speed until combined, about 1 minute. Using a rubber spatula, scrape the bowl and paddle one last time then give the batter a final stir by hand. Pour the filling into the spring-form pan, and smooth the surface with a rubber spatula. Place the roasting pan in the oven and pour enough boiling water into the pan to come halfway up the sides of the cake pan. Bake until the center of the cake is slightly wobbly when the pan is shaken, about 1 1/2 hours. Set the roasting pan on a wire cooling rack and cool until the water is just warm, about 45 minutes. Remove the cake pan from the water bath, discard the foil, and set it on the cooling rack. Run a thin paring knife around the inside edge of the pan to loosen the sides of the cake. Cool to room temperature, about 3 hours. Cover with plastic and refrigerate until chilled, at least 4 hours and up to 3 days. For the whipped cream: Combine the cream, sour cream, brown sugar, salt and bourbon in the bowl of an electric stand mixer fitted with the whisk attachment. Whisk at medium speed about 1 minute, then increase the speed to high and continue to beat until fluffy and doubled in volume, about 1 minute more. Remove the sides of the spring-form pan. Slide a thin metal spatula between the crust and the pan bottom to loosen, then slide the cake onto a serving platter. Let the cheesecake stand at room temperature about 30 minutes, then slice into wedges, topping each slice with a dollop of Brown Sugar & Bourbon Whipped Cream. |
| |
|
Dark Chocolate Tart with Toasted Almonds & Candied Orange For the crust:
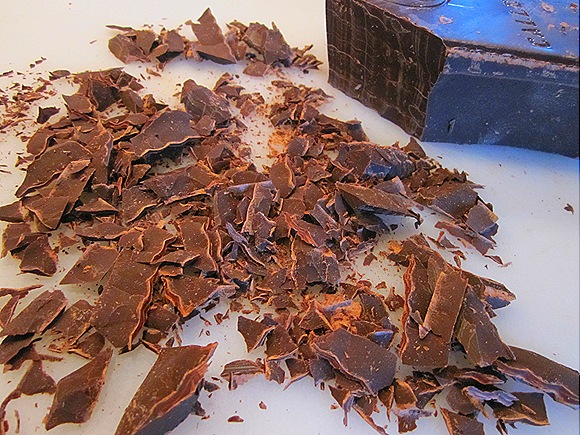
1 stick butter, room temperature 1/2 cup sugar 1/4 tsp ground cinnamon 1/2 tsp kosher salt 6 Tbl unsweetened cocoa powder 3/4 cup all-purpose flour For the filling: 1 cup slivered almonds, toasted, coarsely chopped 2 tsp sugar 1 tsp ground cinnamon 1 1/2 cup heavy whipping cream 12 oz bittersweet chocolate (I love these brands), chopped 1 Tbl plus 1 1/2 tsp Grand Marnier or other orange liqueur candied peel from 2 oranges (see recipe below), plus more for garnish
For the whipped cream:
1 cup heavy cream
2 tsp sugar
1 tsp vanilla For the crust: Combine the butter, sugar, cinnamon and salt in the bowl of an electric stand mixer fitted with the paddle attachment. Beat at medium-high speed until smooth, about 1 minute. Add the cocoa powder, beat on slow speed until just combined, then beat at medium-high until smooth, about 1 minute. Add the flour, and beat on low speed until the dough begins to come together in moist clumps. Transfer the dough to a 10-inch tart pan with a removable bottom. Using your fingers and the heels of your hands, evenly press the dough over the bottom and up the sides of the tart pan. Refrigerate for 3o minutes. Pre-heat the oven to 375°F and arrange a rack in the middle position. Bake the curst until the sides look dry and set, and the bottom looks bubbly, about 15 minutes. Cool to room temperature on a wire rack. If the dough happens to fall down the sides of the pan, use a spoon to press it back up. (The original recipe warned of this happening, but I had no problems with a falling crust.) For the filling: Slice the candied orange peel to about a 1/4-inch dice or a little smaller. In a small mixing bowl, toss to combine the diced orange peel, almonds, sugar and cinnamon, then set aside. In a medium-sized saucepot, bring the heavy cream to a simmer over medium-high heat. Add the chopped chocolate, and whisk until the chocolate is melted and the mixture is smooth. Add the Grand Marnier and stir to combine. Pour about one-third of the melted chocolate-cream mixture over the orange-almond mixture and stir to combine. Transfer the orange-almond mixture into the cooled crust, then evenly spread it over the bottom of the tart. Pour the remaining chocolate-cream mixture over the top, then evenly distribute it across the tart, smoothing the top surface with a rubber spatula. Refrigerate until firm, at least 3 hours. For the whipped cream: Whip the cream to soft peaks (When you stick a spoon into the cream and lift it out, a point will form then droop down after a second or two). Add sugar and vanilla and whip to firm peaks (The point formed in the cream will stand straight up and not fall over). Slice the pie into 12 to 16 wedges. Serve each slice garnished with sugar-coated orange peel slices (See ‘For an Extra Special Treat’ below), and a dollop of lightly-sweetened whipped cream. |
|
Candied Citrus Peels
Adapted from Chocolate Obsession by Michael Recchiuti
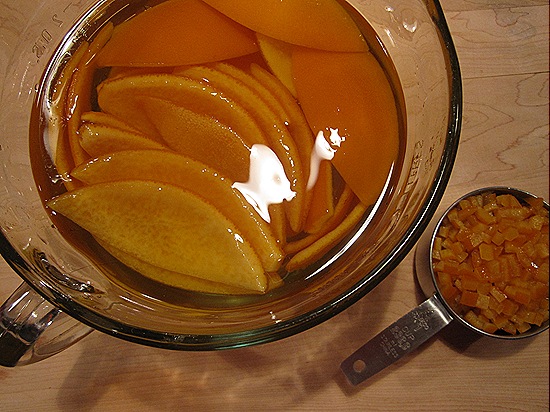
6 large oranges OR 4 medium Ruby Red grapefruits
5 cups granulated sugar
4 1/4 cups water
2/3 cups light corn syrup Cut the fruit into six equal wedges through the stem end. Pull out the flesh of the fruit (the part we normally eat) and save for another use or a snack. Leave the pithy white underside of the skin in place. 
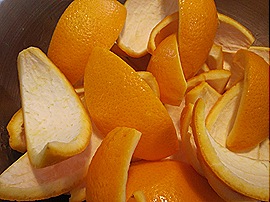
Fill a large saucepot with water and bring it to a boil over high heat. Add the citrus peels to the boiling water. Keep the heat on high, and allow the water to return to a boil, stirring occasionally. As you wait for the water to boil, fill a large mixing bowl with ice water. Drain the peels from the boiling water in a colander, then plunge the peels into the ice water. (This is the first of three times you’re going to do all of this. But don’t get ahead of yourself – step 3 is a little bit different.) Refill the saucepot with water and bring to a boil again. Drain the peels from the ice water, then again add them to the boiling water and wait for the water to return to a boil. Drain the peels again, and then again plunge them into a new bowl of ice water. Refill the saucepot with water for a third time, and again bring to a boil over high heat. This time, while you are waiting for the water to boil, slice off about half of the thickness of the white pith from each piece of citrus peel. It’s best to use a thin, sharp, flexible knife to do this, such as a fillet knife. Discard the slices of pith. Place the peels in the boiling water for a final time, and again return the water to the boil, then drain the peels from the boiling water and plunge them into the ice water. Drain them from the ice water when cooled. 

Now it’s time to candy the peels. Stir together the sugar, water and corn syrup in a large saucepot. Place the pot over medium heat and bring to a boil, stirring occasionally to dissolve the sugar. Meanwhile, cut 2 rounds of parchment paper slightly wider than the circumference of the pot. When the sugar syrup comes to a boil, add the citrus peels and bring back to a simmer. Cover the peels with the 2 sheets of parchment paper, to keep them submerged in the sugar syrup. Adjust the heat to low or medium-low to maintain a bare simmer. Cook until the pith is soft and the peel begins to look translucent, about 1 hour 20 minutes. Turn off the heat and allow the citrus peels to cool in the sugar syrup, at room temperature overnight, with the parchment paper in place and undisturbed. The next day, transfer the citrus peels and syrup to an air-tight container and store in the refrigerator. The candied peels will keep indefinitely. 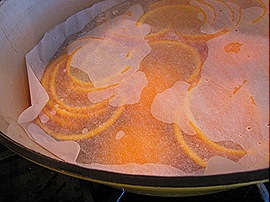

For an extra special treat:
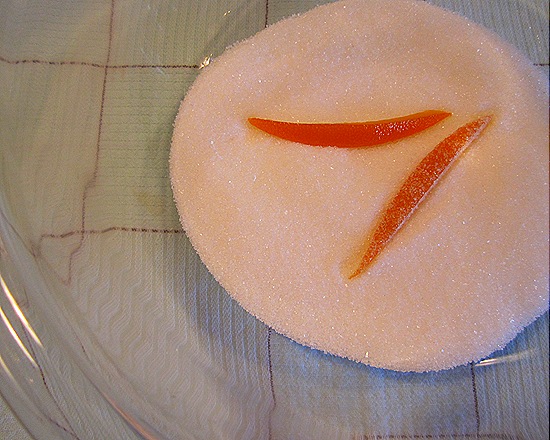
While you can use the candied citrus peels just as they are for recipes like the Chocolate-Orange Whoopie Pies, they’re really, especially lovely all on their own, dusted with sugar. To do this, first remove the peels from the syrup. Rinse off the syrup in cool running water. Slice the pieces lengthwise into 1/4-inch-wide strips. Place a wire cooling rack over a parchment paper or foil-lined sheet pan, then arrange the strips of candied citrus over the rack. Leave them at room temperature overnight, or until dry. Place granulated sugar in a bowl. Add the dried peel, a few strips at a time, and toss to coat evenly with sugar. Store in an air-tight container in a cool, dry place (but not in a refrigerator). 
|
