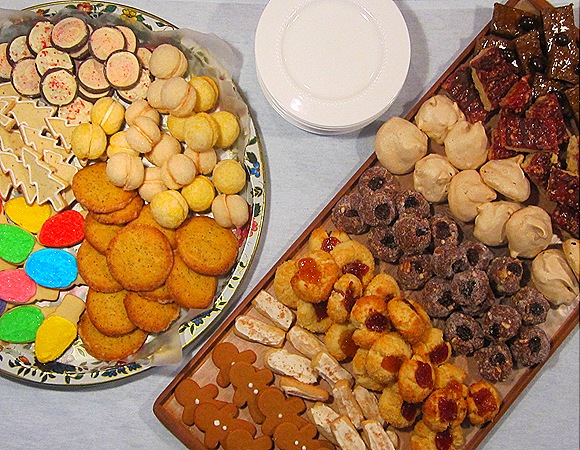
Last Sunday I hosted a Christmas cookie exchange. I invited eleven friends and handed out eleven of my favorite cookie recipes, one for each friend. And I was there too, of course, which rounded it out to an even dozen. A dozen friends, a dozen different kinds of cookies. The instructions were simple – Each of us baked a batch of four dozen cookies, enough for all of us to sample one of each at the party and then bring home three of each kind to share with friends and family. Along with these hundreds of cookie confections (576 to be exact!) I had on hand hot coffee and tea, cold milk and creamy eggnog. And a dozen pretty white boxes, lined with red and green tissue paper, all in a row, ready for filling with assorted cookies.
ONE: Jam Thumbprints
TWO: Cranberry Turtle Bars
THREE: White Chocolate Peppermint Cookies
FOUR: Frosted Cut-Outs
FIVE: Gingerbread Men
SIX: Caramel-Glazed Coffee Shortbread Cookies
SEVEN: Nutmeg Logs
EIGHT: Lemon-Sugar Sandwich Cookies
NINE: Cognac Sugarplums
TEN: Orange Poppy Seed Cookies
ELEVEN: Rosemary Trees
TWELVE: Espresso Chip Meringues
With Christmas already so near, and coming faster than ever, I’d wanted to get this post up as soon possible, so you all might have a chance to make some of these yourselves this year. In step with the glittering sugar-plums, visions of a Monday afternoon blog post danced in my head from the start. But man oh man, I’ve had a crazy week! And try as I might, it just didn’t happen. And so, already later than I wanted to be, I’m going to try and make this post short and sweet as can be. Even thought I could go on and on, I’ll just share a few thoughts about each cookie, and then get straight to the recipes.
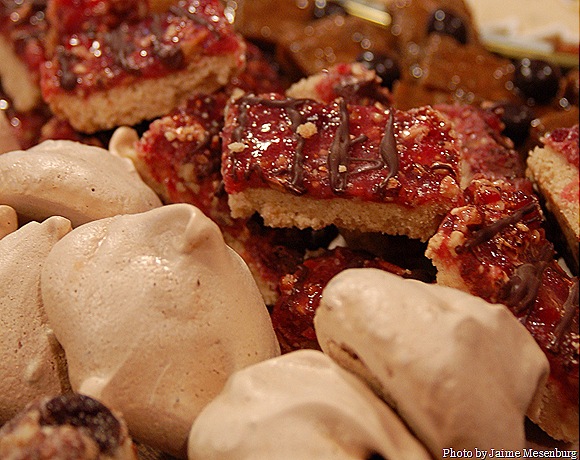
I do have to say though, every last cookie turned out sensationally! Everyone did such a fantastic job, I couldn’t get over it! As each guest arrived and un-veiled her cookie, I became more and more thrilled. And we all had such a blast, tasting one another’s cookies and sharing our baking stories. I can hardly wait to do it all over again next year!

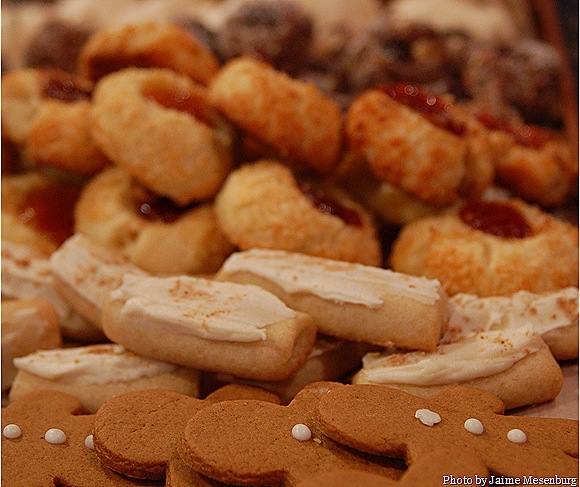
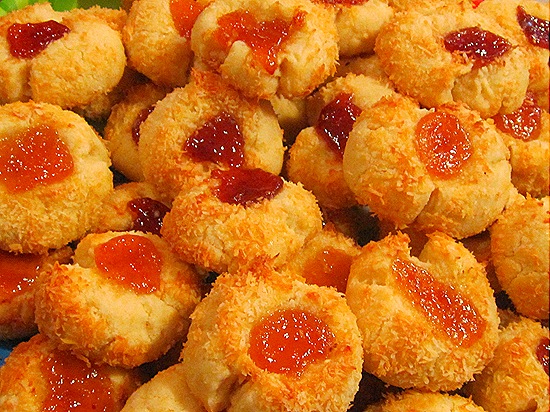
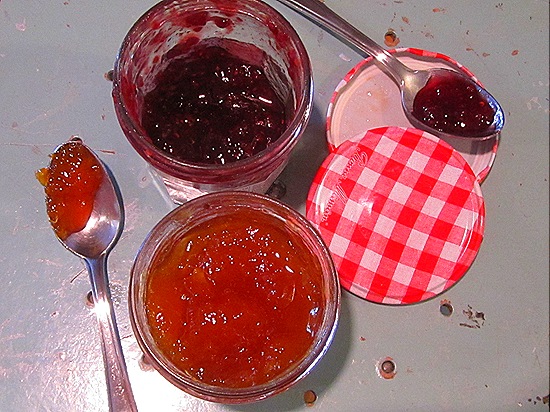
That said, let’s get on to cookie number one! The Jam Thumbprints. There’s a million versions out there, but this is one heck of a thumbprint recipe. It’s one of Ina Garten’s (and you know how much I love her). My friend Rachel made these, and did a stupendous job. Tender yet crisp and a little bit chewy, with rich buttery flavor, sweet flecks of coconut and jewel-like dollops of raspberry & apricot jam nestled on top. Oh man, we’re off to a great start!
ONE: Jam Thumbprints
Makes about 32 cookies
3 ½ cups all-purpose flour
½ tsp kosher salt
3 sticks unsalted butter, room temperature
1 cup granulated sugar
1 tsp vanilla extract
1 large egg
1 Tbl water
7 oz sweetened coconut flakes
Raspberry jam and Apricot jam, roughly a few tablespoons each Pre-heat the oven to 350°F. Arrange the racks in the upper and lower thirds of the oven. Line cookie sheets with parchment paper and set aside. In a medium-sized mixing bowl, whisk to combine the flour and salt. Set aside. Combine the butter and sugar in the bowl of an electric stand mixer fitted with the paddle attachment. (You can also use a hand-held electric mixer.) Beat on medium-high speed until just combined, about 1 minute. Add the vanilla and beat again to combined, about 30 seconds. Scrape down the sides of the bowl and the paddle with a rubber spatula. With the mixer on lowest speed, add the flour mixture to the butter-sugar mixture. Mix on low until the dough just starts to come together. Be careful to not over-mix. Transfer the dough onto a floured work space. Gather into a flat disk, then wrap in plastic and refrigerate for about 30 minutes. Divide the dough into about 32 equal pieces, roughly 1 ¼ inch wide. Using your hands (slightly dampening them with water helps), roll the pieces of dough into balls. Lightly press each ball to flatten it slightly, to about a 1-inch thickness. Make an egg wash by beating together the egg and water in a small bowl. Place the coconut flakes in another small bowl. Dip each flattened ball of dough into the egg wash, then roll it in the coconut flakes. Place the balls onto the parchment-lined cookie sheets, spacing them about 2-inches apart. Using your finger, press a light indentation into the top of each dough ball. Place a heaping ¼ teaspoon of jam (half of the cookies with raspberry and the other half with apricot) into each indentation. 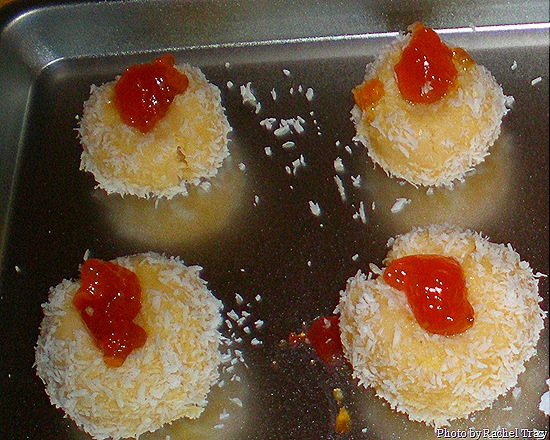
Bake, 2 sheets at a time, until the coconut is golden brown and the cookies are set, about 20 to 25 minutes. Be sure to rotate the pans (switch their positions and turn each 180 degrees) half-way through cooking time. Cool for a couple minutes on the pan, before lifting the cookies with a rubber spatula to cool on cooling racks or on a clean counter. Cool to room temperature before storing at room temperature in an air-tight container. |
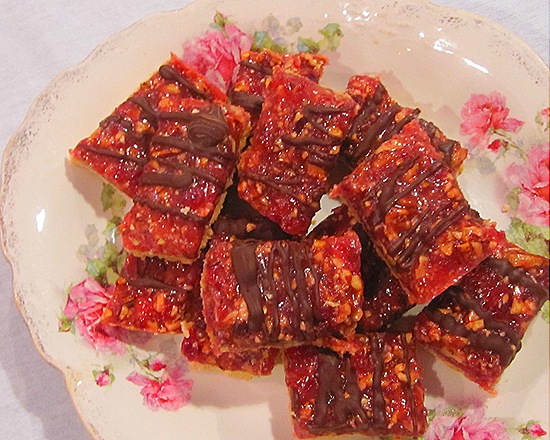
Cookie number two, from my friend Andrea’s kitchen, the Cranberry Turtle Bars. These were my absolute favorite of the mix. Buttery shortbread base, and then a chewy layer of caramel, studded with toasted pecans and cranberries – fresh cranberries that cook down to a sticky red mess in the bubbling caramel sauce. And finally a dark drizzling of bittersweet chocolate. Rich, sweet, tart, fabulous. Entirely delicious and completely satisfying. This is my new cookie.
TWO: Cranberry Turtle Bars
Makes 3 dozen bars
For the base:
2 cups all-purpose flour
1/2 cup light brown sugar, packed
½ tsp kosher salt
1 ½ sticks cold butter, cut into ½-inch cubes For the topping:
2 sticks butter
1 2/3 cups granulated sugar
¼ cup light corn syrup
½ tsp salt
1½ cups fresh (or frozen (but not thawed)) cranberries (6 ¾ oz), coarsely chopped
1 tsp vanilla
3 cups pecans (12 oz), toasted and cooled, then coarsely chopped
2 oz bittersweet chocolate (not semi-sweet or unsweetened), very finely chopped Special equipment:
a candy thermometer To make the base: Preheat the oven to 350°F and arrange a rack in the middle position. Line a 9 x 13-inch shallow baking pan with foil, leaving a 2-inch overhang on the two short sides. Butter all four sides, but not the bottom. Add the flour, brown sugar and salt to the bowl of an electric food processor. Pulse a few times to combine. Add the cubed butter and pulse until the mixture begins to form small, pea-sized lumps. Transfer the dough to the prepared baking pan, then press down firmly with your fingers and the heel of your hand to form an even layer. Bake until lightly golden and firm, anywhere between 15 to 25 minutes. Cool on a wire rack to room temperature. To make the topping: Melt the butter in a medium-sized sauce pan over medium heat. Stir in the sugar, corn syrup and salt. Increase the heat to medium-high and boil, stirring occasionally, until the mixture is deep golden brown and registers 245°F on a candy thermometer, about 8 minutes. (If it takes longer, so be it – The important thing is the temperature, not the time.) Carefully add the cranberries and stir to combine. Continue to boil until the caramel returns to 245°F. Remove the pot from the heat and stir in the vanilla. Then add the pecans and stir until well coated. Working quickly, spread the caramel topping over the cookie base, using a rubber spatula to distribute the sauce and a fork to distribute the nuts and berries evenly. Cool completely to room temperature. Once cool, lift the bars by the foil from the pan and transfer to a cutting board. Cut in 6 cross-wise strips, then 6 length-wise strips, for a total of 36 bars. (I like to sliced down the center first, and then slice each half in three even pieces. Doing this in both directions gives me the most even results.) Place the chocolate in a small heat-safe bowl placed over a pot with about an inch of simmering water. (Make sure the bowl fits snugly inside the pot, or the chocolate will burn from the direct heat of the stove-top.) Stir until melted and smooth. Transfer the chocolate to a small heavy-duty plastic bag. Using a scissors, snip off a tiny bit of one corner to form a small hole. Evenly pipe the chocolate in wavy stripes across the bars. Let stand at room temperature until the chocolate sets, about 30 minutes to 1 hour. Store at room temperature in an air-tight container, up to 3 days. |
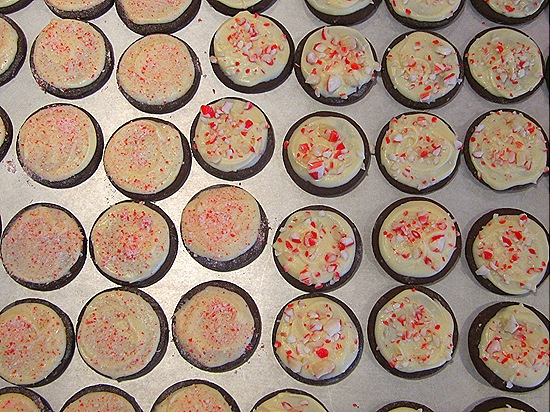
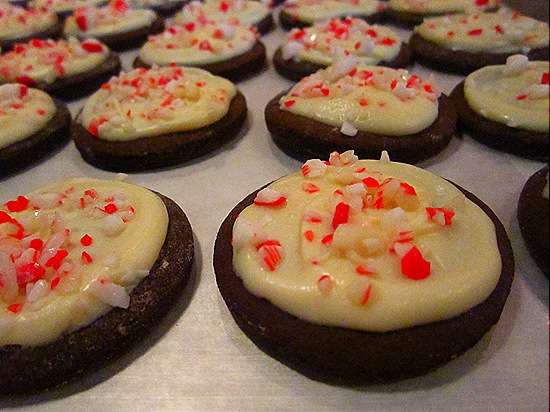
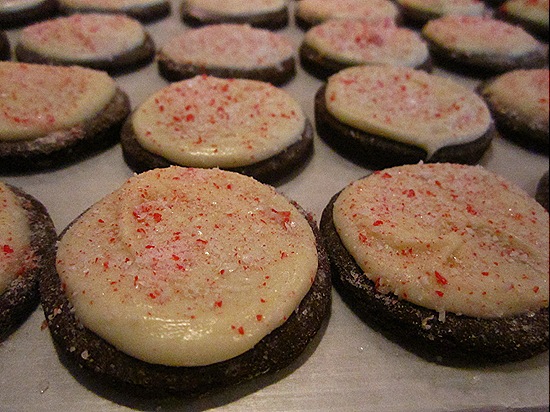
The White Chocolate Peppermint cookies were supposed to go to my friend Jen. But she ended up having to work at the last minute, and so I happily took on the task, eager to try them out for myself. Deep brown wafer-like circles, flavored with chocolate and peppermint, thin and crisp yet tender. Topped with a smooth smear of creamy white chocolate then dusted with crushed candy cane. Very cute and very Christmassy. Needless to say, very delicious too!
THREE: White Chocolate Peppermint Cookies
Makes about 6 dozen cookies
cup of all-purpose flour, plus more for rolling the dough
½ cup unsweetened Dutch-process cocoa powder
½ tsp baking soda
½ tsp baking powder
½ tsp salt
5 Tbl unsalted butter, room temperature
¾ cup sugar
1 large egg
1 large egg yolk
¾ tsp pure peppermint extract
8 candy canes, or 30 round peppermint candies, crushed
12 oz white chocolate, chips or coarsely chopped In a medium-sized mixing bowl, whisk together the flour, cocoa powder, baking soda, baking powder and salt. Set aside. In the bowl of an electric stand mixer, combine the butter and sugar. (You can also use a hand-held electric mixer too.) Beat on medium-high speed until light and fluffy, about 2 minutes. Scrape down the sides of the bowl and the paddle with a rubber spatula, as needed. Reduce the speed to medium-low. Add the egg, then the yolk, beating well after each addition. Beat in the peppermint extract. Slowly add the flour mixture, and beat only until just incorporated. Shape the dough into two equal disks. Wrap in plastic, and refrigerate until firm, at least 1 hour and up to 2 days. Preheat the oven to 325°F and arrange the racks in the upper and lower third positions. Line 2 baking sheets with parchment paper and set aside. On a lightly floured surface, roll out one disk of dough to 1/8-inch thickness. Using a 2-inch round cookie cutter, cut out circles, and arrange 1-inch apart on the parchment-lined baking sheets. (Roll and cut the left-over scraps once, then discard the remaining scraps.) Freeze the cookies on their baking sheets until firm, about 15 minutes. Repeat with the remaining disk. 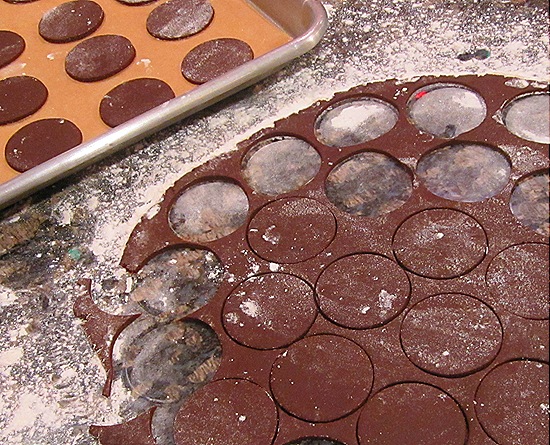
Bake, 2 sheets at a time, until the cookies are dry to the touch, about 12 minutes, rotating the pans (trading their positions and turning them each 180 degrees) about half-way thorough the cooking time. Transfer the parchment with the cookies to wire racks to cool. Continue baking the remaining cookies. Undecorated cookies can be kept at room temperature in an air-tight container for up to 3 days. Sift the crushed peppermint candy, separating the large pieces from the dust, and reserving both. 
Place the white chocolate in a heatproof bowl set over a pot filled with about an inch of gently simmering water. Stir frequently as the chocolate melts. Remove from the heat. Using a small off-set spatula, frost each cookie top with a smooth circle of melted chocolate. Immediately sprinkle with about ¼ teaspoon of either the candy pieces or the dust. Repeat with the remaining cookies, sprinkling half with candy pieces and half with candy dust. Refrigerate on the baking sheets until set, up to 3 hours. Keep refrigerated in an air-tight container. The cookies will keep up to 5 or so days, but are best eaten earlier rather than later.
 |
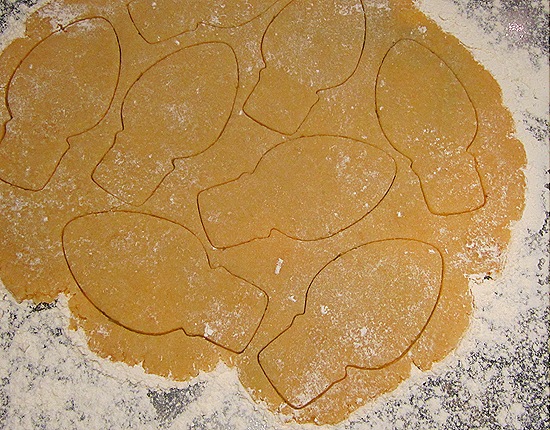
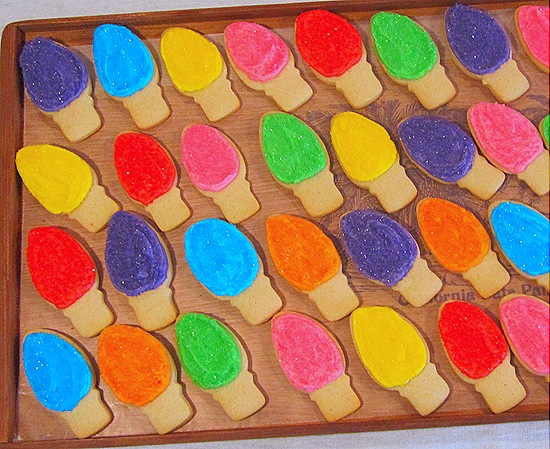
The fourth cookie, the frosted cut-outs, were assigned to me all along. A recipe my mom has been baking every Christmas for years, these soft, buttery cut-out cookies with their sweet, creamy frosting are just too delicious to describe. And they’re so much fun to decorate, too! This year I went with Christmas lights, dying seven scoops of frosting seven different colors, then dusting the frosted lights with matching sugars. Lined up all in a row, they seemed to glow and glitter like real twinkle lights.
| FOUR: Frosted Cut-Outs Cookies adapted from a recipe by Tasha Tudor, by way of my mom, Susan Anderson Frosting adapted from a recipe by my aunt, Janet Schoen Makes about 5 dozen small to medium-sized cut-outs (about 3 to 4 inches high/wide)
For the cookies: 5 cups all-purpose flour 1 tsp baking soda 1/2 tsp kosher salt 2 sticks butter, room temperature 2 sticks margarine, room temperature 2 cups granulated sugar 2 eggs 3 Tbl milk 1 Tbl vanilla For the frosting: 1/3 cup margarine, room temperature 3 cups powdered sugar 1/2 tsp vanilla 2 Tbl milk, more if needed various shades of food coloring colored sugars, sprinkles and other edible decorations (optional) To make the cookies: In a medium-sized mixing bowl, whisk to combine the flour, baking soda and salt. Reserve. Combine the butter, margarine and sugar in the bowl of an electric stand mixer fitted with a paddle attachment. (You can also use a hand-held electric mixer.) Beat on medium-high speed until light and fluffy, about 3 minutes. Using a rubber spatula, scrape down the sides of the bowl and the paddle, as needed. Add the eggs, one at a time and, and beating until combined, after each addition. Add the milk and vanilla and beat to combine. Scrape again with the rubber spatula. With the mixer running at low speed, gradually add the flour mixture. Continue to mix just until a soft dough forms. Scrape down the sides of the bowl again and give one last stir to combine. Transfer the dough to a clean work surface and shape into a flat, circular disk, about 2-inches thick. Wrap in plastic, then refrigerate until cold, about 2 hours, or up to 2 days. Pre-heat the oven to 350°F and arrange the racks in the upper and lower thirds of the oven. Place the chilled dough on a lightly floured work surface, and knead it a few times until smooth and not sticky. Divide the dough into four even portions, then shape these portions into balls. Working one at a time, place each ball on a large sheet of parchment paper, and roll with a rolling pin to a thickness of about 1/4-inch. Transfer by the parchment paper to a cookie pan, then refrigerate about 10 to 15 minutes. (This step of rolling on parchment then refrigerating is not necessary, but it really helps to get nice, sharp cookies edges, lending a much better shape to the cookies overall.) Transfer the chilled, rolled dough by its parchment paper, from the cookie pan back to the countertop. Using variously shaped cookie cutters (I used a Christmas light shape, about 3-inches high), cut out the shapes from the sheet of dough. Using a thin metal spatula, transfer the cut dough to the cookie pan, spacing the cookies about 1-inch apart. When the pan is filled with cookies, refrigerate until ready to place in the oven. Repeat with the remaining portions of dough. Roll together the dough scraps to a 1/4-inch thickness, and continue cutting cookies until all the dough is used. Bake, two pans at a time, until set and lightly golden around the edges, about 8 to 10 minutes. Be sure to rotate the pans (switch their positions and turn each 180 degrees) half-way through cooking time. Allow the cookies to cool on the pans for about 2 minutes, then transfer to a wire cooking rack with a metal spatula. Cool to room temperature. To make the frosting: Combine all the ingredients in the bowl of an electric stand mixer fitted with the whisk attachment. (You can also use an electric hand-held mixer.) Whisk on medium-high speed until well combined, smooth, and spreadable. If the frosting appears too thick or dry, add more milk, one teaspoon at a time until you achieve a nice, spreadable consistency. Divide the frosting in to separate bowls – the number of which, and the amount of frosting in each, will depend completely on you and how you want to decorate your cookies. For the best looking frosted results, transfer the colored frosting to pastry bag fitted with a small round piping tip. Pipe a border evenly around the space you want to frost, then fill the interior with a quick zigzag of more frosting. Smooth out the surface with a small off-set spatula. Immediately decorate with the colored sprinkles, sugars (like I did) or other decorations, before the frosting has time to harden. Allow the frosted, decorated cookies to stand at room temperature until the frosting is well set, about 1 hour. Then keep at room temperature, arranged in a single layer, covered with plastic wrap or in an air-tight container. Will keep up to 5 or so days, but are best eaten earlier rather than later. |
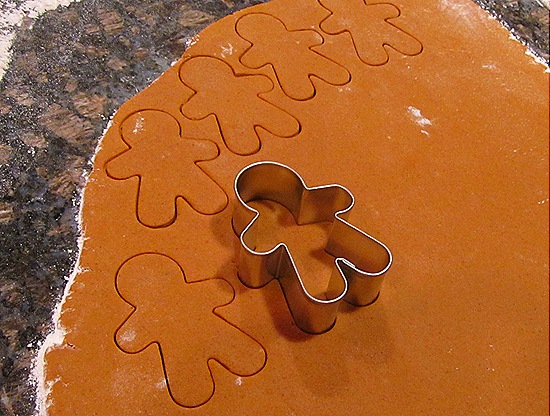
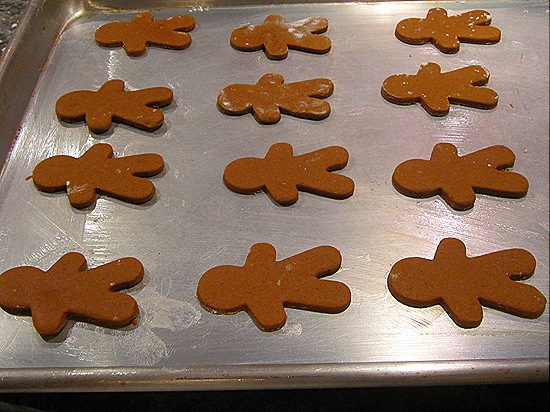
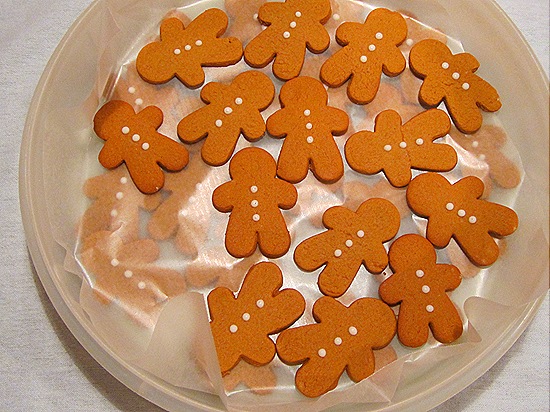
And of course we had to have gingerbread. And thanks to my friend Veronica, we did. A whole army of gingerbread boys, thin and crisp and way too cute, all buttoned up with little dots of lemon icing. Straight from the pages of The Joy of Cooking, this is a great go-to gingerbread recipe, rich with warm spices and the deep flavor of molasses. Mmmmm.
FIVE: Gingerbread Boys
Makes about 2 dozen men (5-inches tall) and about 5 dozen boys (2 1/2-inches tall) For the cookies:
3 cups all-purpose flour
1 ½ tsp baking powder
¾ tsp baking soda
¼ tsp salt
1 Tbl ground ginger
1 ¾ tsp ground cinnamon
¼ tsp ground cloves
6 Tbl butter, room temperature
¾ cup dark brown sugar, packed
1 large egg
½ cup molasses
2 tsp vanilla
1 tsp finely grated lemon zest For the icing:
1 cup powdered sugar, more if needed
2 to 3 tsp lemon juice, more if needed To make the cookies:
In a large mixing bowl, thoroughly whisk together the flour, baking powder, baking soda, salt, ginger, cinnamon and cloves. Set aside. Combine the butter, brown sugar and egg in the bowl of an electric stand mixer fitted with the paddle attachment. Beat on medium speed until well blended, about 2 minutes. Scrape down the sides of the bowl and paddle with a rubber spatula. Add the molasses, vanilla and lemon zest, then beat until well combined, about 1 minute. With the mixer on low speed, gradually add the flour mixture. Continue to mix until well blended and smooth. Divide the dough in half. Wrap each half in plastic. Let stand at room temperature for at least 2 hours and up to 8 hours. (The dough can be refrigerated for up to 4 days also. But be sure to return the dough to room temperature before proceeding.) To bake, preheat the oven to 375°F. Position a rack in the upper third of the oven. Generously butter two cookie sheets. Place one portion of the dough on a floured work surface. Lightly sprinkle flour over the surface of the dough, and dust a rolling pin with flour too. Roll the dough out to a scant ¼-inch thickness (just under ¼-inch). To prevent sticking, lift the dough frequently, and add a bit more flour as necessary. Cut out the cookies using a 3 to 4-inch tall gingerbread man cutter. With a thin metal spatula, transfer the cut-outs to the buttered cookie sheets, spacing them about 1 ½ inches apart. Roll together the dough scraps to ¼-inch thickness and continue cutting out cookies until all of the dough is used. Bake, one sheet at a time, until the cookie edges are just barely dark, about 7 to 10 minutes. Make sure to rotate the cookie sheet halfway through baking. Remove the cookie sheet from the oven and allow the cookies to rest on the pan for about 3 minutes, to cool and firm slightly. Then transfer the cookies using a metal spatula to a wire rack to cool. Cool to room temperature before storing at room temperature in an air-tight container.
To ice the cookies:
In a small mixing bowl, whisk together the sugar and lemon juice, whisking until it is thick yet smooth. Adjust the consistency as needed with more sugar (if too thin) or lemon juice (if too thick). Transfer the icing to a piping bag fitted with a small round trip. Decorate each cooled cookie with three icing dots for buttons. Add more icing decorations too if you’d like. Allow to set at room temperature for about 30 minutes, then store at room temperature in an air-tight container. The cookies will keep up to 5 or so days, but are best eaten earlier rather than later. |
Made by my friend Tammy, cookie number six was a bit on the fancy side, and way on the yummy side. Coffee flavored shortbread rectangles, speckled with flecks of finely ground coffee beans, coated in a sticky, espresso-spiked caramel topping then dotted with a single chocolate-covered espresso bean. As beautiful as anything, and absolutely delicious!
SIX: Caramel-Glazed Coffee Shortbread Cookies
Adapted from a recipe by Flo Braker from Food & Wine
Makes 40 bars 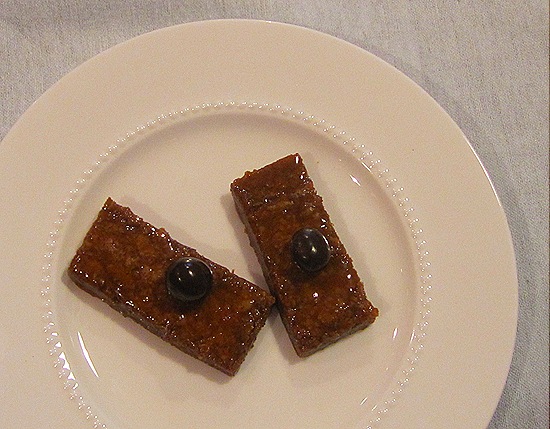
For the shortbread base:
2 ¼ cups plus 2 Tbl all-purpose flour
½ cup packed light brown sugar
1 Tbl finely ground coffee beans
½ tsp salt
2 sticks unsalted butter, room temperature
1 tsp vanilla extract For the glaze:
¼ stick unsalted butter, room temperature
1/3 cup light brown sugar, packed
1 Tbl strong-brewed espresso
1 Tbl light corn syrup
Pinch of salt
40 chocolate covered espresso beans To make the shortbread base: Preheat the oven to 350°F and arrange a rack in the middle position. Line a 9 x 13-inch shallow baking pan with foil, leaving a 2-inch overhang on the two short sides. Butter all four sides, but not the bottom. Add the flour, brown sugar, ground coffee and salt to the bowl of an electric food processor. Pulse a few times to combine. Add the cubed butter and pulse until the mixture begins to form small, pea-sized lumps. Transfer the dough to the prepared baking pan, then press down firmly with your fingers and the heel of your hand to form an even layer. Bake until lightly golden and firm, anywhere between 15 to 25 minutes. Cool on a wire rack about 10 minutes. Grasping the foil overhangs, carefully transfer the shortbread base from the pan to the countertop. Using a ruler, cut the still warm shortbread lengthwise into 8 strips. (Slice lengthwise in half, then slice each half in half to get quarters, then slice each quarter in half to get eighths – It’s the best way to achieve even slices.) Then slice cross-wise into five even rows. Let the shortbread bars cool completely. Note: Don’t separate the bars from each other. Keeping them closely together will help when it comes to glazing their tops. To make the glaze: In a small to medium saucepan, combine the butter, brown sugar, espresso, corn syrup and salt. Stir to combine, then bring to a boil over medium heat, occasionally swirling the pan. Boil until just thickened, about 1 ½ to 2 minutes, then remove from the heat. When the bubbling subsides, immediately pour the hot glaze over the shortbread bars. Working very quickly, spread the glaze in an even layer with a small off-set spatula. Using the tip of a lightly oiled paring knife, score the glaze between the shortbread bar edges, without dragging. (This means, make a bunch of separate cuts, rather than dragging the knife down the rows. And you’ll probably want to rinse, dry and re-oil your knife time every once in a while too.) Press a chocolate-covered espresso bean into the center of each bar. Let cool slightly, then carefully lift out the bars and transfer to a plate. These can be kept in an air-tight container, for up to 5 days. |
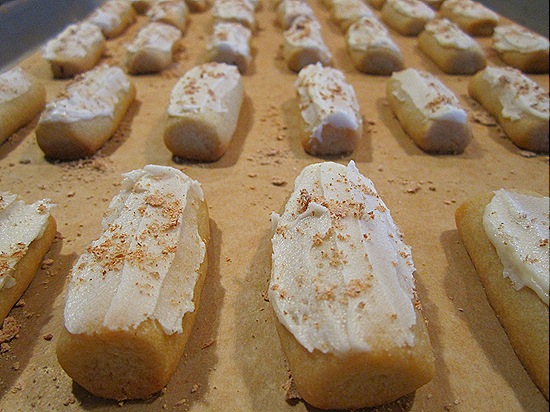
Perhaps the most humble of the dozen, small and pale and admittedly a little bit plain, these Nutmeg Logs were maybe one of the all-around best too. Delicate in flavor, yet made pleasantly complex by the combining forces of freshly grated nutmeg and deep, dark rum. A perfect cookie to have with a hot cup of tea. These mini Yule log treats came courtesy of Downstairs Sara, who actually came upstairs to bake them. Baking alongside each other, listening to Christmas carols, we relished our first chance to hang out in a long, busy while.
SEVEN: Nutmeg Logs
Adapted from the Dayton Daily News, 1990, by way of my friend, Erin Carr Makes about 4 dozen cookies
For the cookies:
3 cups all-purpose flour
1 tsp freshly grated nutmeg
½ tsp salt
2 sticks butter, room temperature
¾ cup granulated sugar
1 large egg
3 tsp vanilla
2 tsp rum For the frosting:
3 Tbl butter, room temperature
½ tsp vanilla
1 tsp rum
1 ½ cups powdered sugar
1 Tbl plus 1 tsp heavy whipping cream
nutmeg, for sprinkling. 
To make the cookies: Preheat the oven to 350°F. In a medium sized mixing bowl, whisk to combine the flour, nutmeg and salt. Set aside. Combine the butter and sugar in the bowl of an electric stand mixer fitted with a paddle attachment. Beat on medium-high speed until light and fluffy, about 3 minutes. Using a rubber spatula, scrape down the sides of the bowl and the paddle with a rubber spatula, as needed. Add the egg, vanilla and rum and beat to combine, about 1 minute. Add the flour mixture and mix on low until thoroughly combined, about 1 minute. Scrape again with the rubber spatula, if needed. Divide the dough into about 10 or 12 pieces. On a lightly-flowered work surface, roll these pieces of dough into long ropes, about ½-inch diameter or a little thicker. Slice into 2-inch lengths. (Roll together the rough, un-used ends of the dough, then repeat rolling it into a rope and cutting it to 2-inches.) Place the ‘logs’ onto an ungreased baking sheet, spacing them about 1-inch apart. 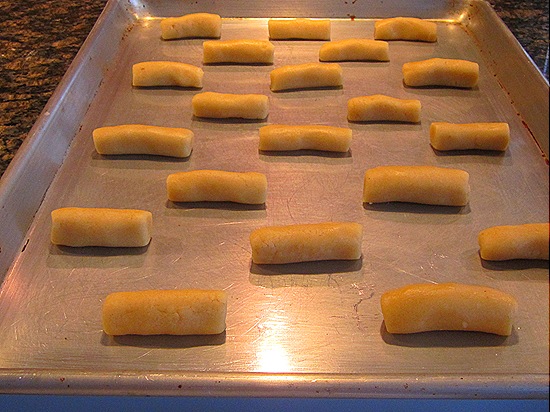
Bake until firm and lightly golden, about 10-20 minutes. Cool for about 3 minutes on the pan, then transfer with a metal spatula to a wire cooking rack. Cool completely to room temperature. To make the frosting: Combine the butter, vanilla and rum flavoring in the (cleaned and dried) bowl of an electric stand mixer fitted with the paddle attachment. Beat on medium-high speed until well combined and fluffy, about 2 minutes. Add ½ cup of the powdered sugar and beat to combine, then add the cream and beat to combine. Add the remaining powdered sugar and beat until smooth and spreadable.
To assemble the cookies: Spread the frosting on the tops of each cookie, then immediately sprinkle lightly with nutmeg. Allow the cookies to stand at room temperature until the frosting sets, then store (arranged delicately, so they’re not crammed together) refrigerated in an air-tight container. |
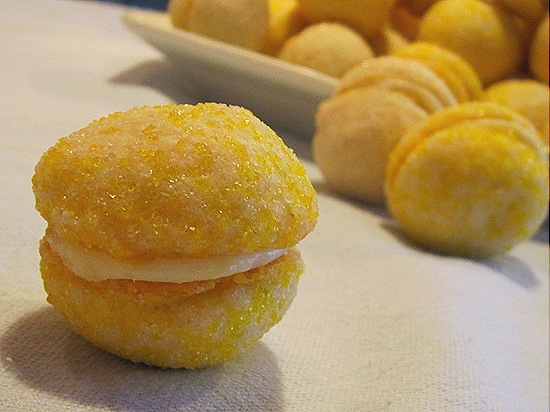
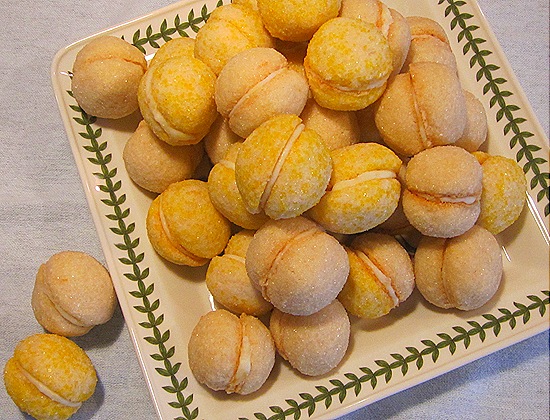
Cookie number eight fell into my lap too, another cancellation that I greedily snatched up. These glittering lemon-sugar sandwich cookies looked so adorable, I couldn’t resist adding them to my Saturday baking agenda. Incredibly tender cookies, so delicate and fine, with a crunchy bite of sugar coating and a smooth, bright filling of zesty lemon icing. Fabulous in every way, and one of my favorites in the mix.
EIGHT: Lemon-Sugar Sandwich Cookies
Makes between 3 and 4 dozen sandwiches
For the cookies:
2 cups all-purpose flour
1 cup cornstarch
1/2 tsp salt
3 sticks unsalted butter, room temperature
3/4 cup powdered sugar
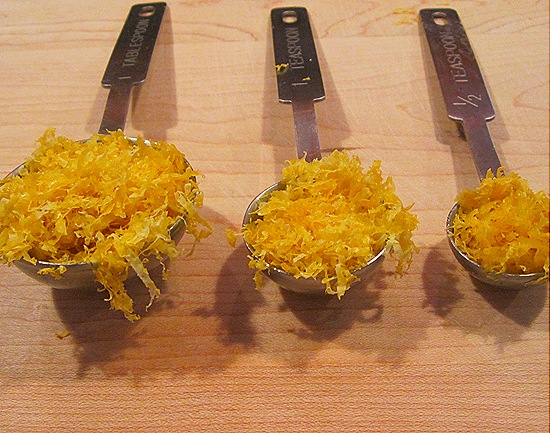
1 Tbl plus 1 ½ tsp finely grated lemon zest (from about 3 lemons)
1 1/2 tsp vanilla
½ cup plus ¼ cup granulated sugar, divided, for dusting
2 Tbl yellow sugar, for dusting For the filling:
1 cup powdered sugar
1 Tbl finely grated lemon zest (from about 2 lemons)
1 Tbl fresh lemon juice
2 Tbl light corn syrup
½ stick unsalted butter, softened To make the cookies: Preheat the oven to 350°F and arrange a rack in the middle position. Line 2 large baking sheets with parchment paper. In a medium-sized mixing bowl, whisk together the flour, cornstarch and salt. Set aside. Combine the butter and powdered sugar in the bowl of an electric stand mixer fitted with the paddle attachment. Beat on medium-high speed until light and fluffy, about 3 minutes. Add the lemon zest and vanilla and beat to combine. With the mixer running at low speed, gradually add the flour mixture. Continue to mix just until a soft dough forms. Add the half cup granulated sugar to a small bowl. In a separate small bowl, combine the remaining ¼ cup granulated sugar with the 2 Tbl yellow sugar and stir to combine. One by one, roll scant half tablespoons of dough into balls, then drop into one or the other bowls of sugar, turning to coat completely. Drop half into the plain white sugar and half into the white-yellow sugar mixture. (You could simply do one or the other, but for some reason, I really like the combination.) Transfer the sugar coated balls to the parchment-lined baking sheet, spacing the balls about ¾-inch apart, until the baking sheet is filled. 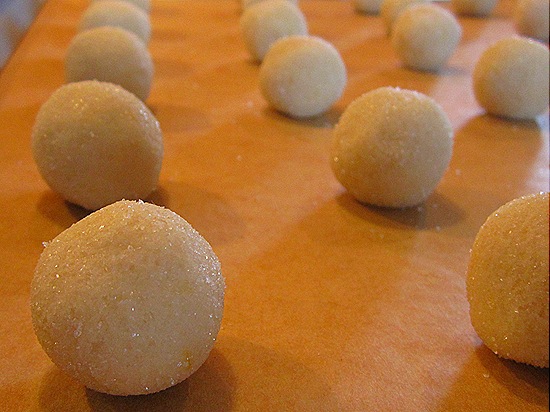
Refrigerate for 30 minutes. (This will help preserve their rounded shape.) Bake, one baking sheet at a time, until the tops are lightly cracked but the cookies are still pale, about 15 minutes. (The bottoms should be pale golden.) Transfer the cookies by their parchment to a wire rack. Cool completely to room temperature. The un-frosted cookies can be kept at room temperature in an air-tight container. 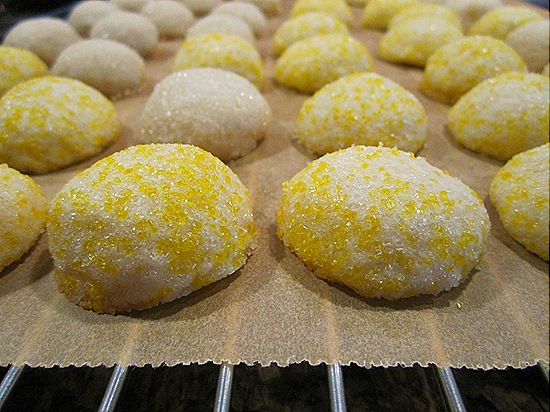
To make the filling: Combine the powdered sugar, lemon zest, lemon juice, corn syrup and butter in the (cleaned and dried) bowl of an electric stand mixer fitted with a paddle attachment. Beat at medium speed until well combined, about 1 to 2 minutes. Transfer to a heavy-duty plastic bag. Snip off a corner to form a small hole. To assemble the cookies: Flip over half of the cookies to expose their flat bottom sides. Pipe about ½ teaspoon of filling onto the center of each cookie bottom. Sandwich with the remaining cookies, matching like colors, white with white and yellow with yellow, pressing gently to secure them. Keep the finished cookies refrigerated in an air-tight container.
 |
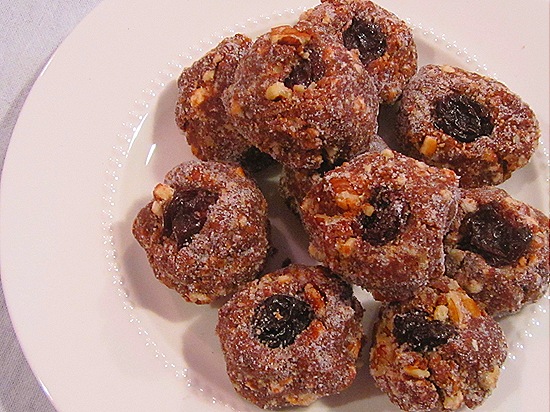
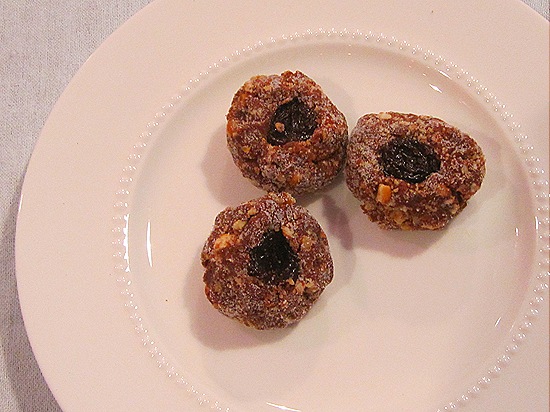
Speaking of favorites, cookie number nine came in second place for me. And a close second at that, just a hair behind the cranberry bars. I’m pretty sure that these Cognac Sugarplums were high on the list of everyone else too. Deliciously made by my friend Becky, they were a huge hit all around. And notice, I said ‘made', not ‘baked’. These glistening gems of goodness are no bake! Melted chocolate combines with chopped pecans and crushed vanilla cookies, and then, best of all, a good boozy dose of cognac! Rolled into bite-sized balls, dusted with sugar, then studded with a plump, chewy, tart dried cherry. All I can say is (and just like my friend Brandon said when she passed this recipe on to me), they’re way better than they even sound!
NINE: Cognac Sugarplums
Adapted from a recipe of my friend Brandon Stears
Makes about 2 dozen 1 1/2-inch balls
6 oz semisweet chocolate
1/2 cup granulated sugar, plus extra for coating
1/4 cup light corn syrup
1/3 cup Cognac (or just Brandy really – Cognac is just a special type of Brandy)
2 1/2 cup finely crushed vanilla wafers
1 cup finely chopped pecans
about 24 tart dried cherries Melt chocolate in a large heat-proof mixing bowl set over a large pan filled with about an inch of simmering water. (It’s important that the bowl fits into the pan, or the chocolate will burn from the direct heat of the stove.) Melt the chocolate, stirring frequently. (Of course, you can do this in a microwave too. Keep microwaving for 20 seconds, over and over, and stirring with a rubber spatula in between, until the chocolate is melted and smooth.) Remove from the heat, then stir in sugar, corn syrup and Cognac. Stir in the crushed vanilla wafers, and then the pecans. Roll the dough into 1 1/2-inch balls. Roll each ball in granulated sugar, then press a tart dried cherry into the top of each ball. Store refrigerated in an air-tight container. Will keep up to a week or so.
 |
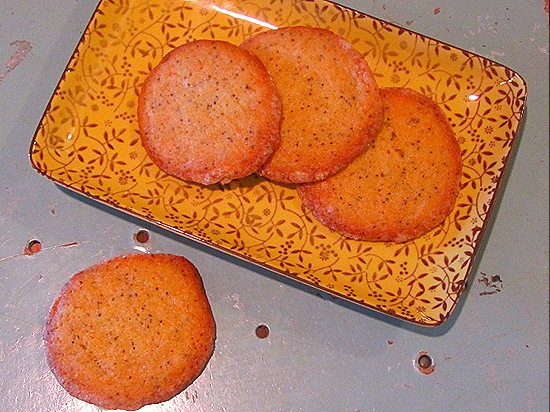
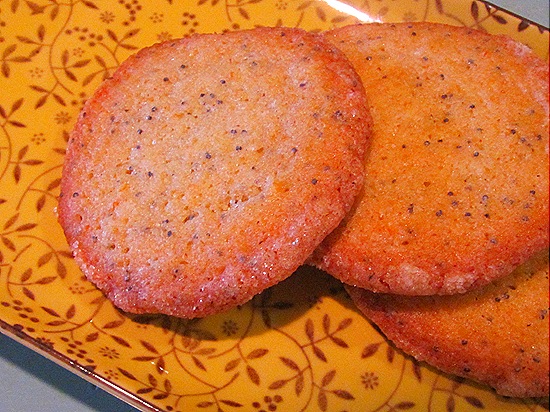
Cookie number ten, the Orange Poppy Seed Cookies, baked by my friend Dana. Crisp and a little bit chewy, with golden sugar-dusted edges, bright orange flavor and tiny black polka-dots of poppy seeds. They tasted deliciously of something very familiar, and it took me a few bites to figure it out, but then I realized… Fruit Loops! Nearly identical in flavor and texture to one of my favorite sugary cereals. Sure to be a hit with any kid, and best paired with a glass of cold milk, they’re great for dunking!
TEN: Orange Poppy Seed Cookies
Adapted from a recipe of my friend Kate Cole
Makes about 5 dozen cookies
2 1/2 cups all-purpose flour, plus more for dusting
2 Tbl poppy seeds
½ tsp baking powder
½ tsp salt
2 stick butter, room temperature
1 1/2 cups granulated sugar, plus more for dusting
2 large eggs, plus 1 egg white
2 Tbl freshly squeezed orange juice
2 Tbl finely grated orange zest, packed (from about 3 large oranges)
2 tsp finely grated lemon zest (from about 1 lemon) 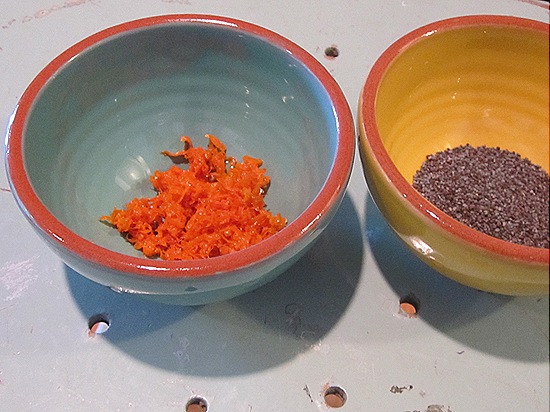
Note: The dough should be made several hours ahead or even the day before baking. In a medium-sized mixing bowl, whisk to combine the flour, poppy seeds, baking powder and salt. Set aside. Combine the butter and sugar in the bowl of an electric stand mixer fitted with the paddle attachment. Beat at medium-high speed until light and fluffy, about 3 minutes. Using a rubber spatula, scrape down the sides of the bowl and the paddle. Add the eggs (just the two whole eggs, not the whites), orange juice, orange zest and lemon zest. Beat until blended, then scrape the bowl again. Add the flour mixture and mix on low until just combined. Scrape the sides of the bowl again, then give one last stir. Halve the dough. Shape each half into a long log. Lightly dust two sheets of parchment paper, then place one log on each sheet. Lightly dust the logs with flour, then roll in the parchment to a 1 ½ inch diameter, pressing a ruler along the edge of the log at each turn to narrow and shape the log. (This is really difficult to describe without a visual aid. Luckily, I’ve found one on the web. Check out this video from my alma mater. This ruler business comes at about 3:14.) Freeze until firm, at least 1 hour. (Remove the logs every ten minutes or so, during the first half hour, and lightly roll them on the countertop, to help maintain the round shape.) Pre-heat the oven to 375°F. Arrange the racks in the upper and lower thirds of the oven. Line a few baking pans with parchment paper and set aside. Using a fork, beat the egg white in a small mixing bowl. Place about ½ cup granulated sugar in a large plate. Lightly but evenly brush each log with the beaten whites, then roll the log in the sugar, to evenly coat its sides. Slice each log into rounds of about 3/16-inch (just under ¼-inch) thickness with a sharp knife. To help maintain the round shape of the log and the resulting cookies, turn the log a little bit after each slice. (Each log should yield between 2 and 3 dozen rounds.) Space the rounds about 2-inches apart on the parchment-lined baking pans. Bake, 2 pans at a time (and keeping the rest of the dough refrigerated), until the edges are golden, 10-15 minutes, rotating the pans (trading their positions and turning them each 180 degrees) about half-way thorough. Let cool on the baking pans, placed on wire racks. Cool completely to room temperature before storing at room temperature in air-tight containers, for up to 3 days.
 |
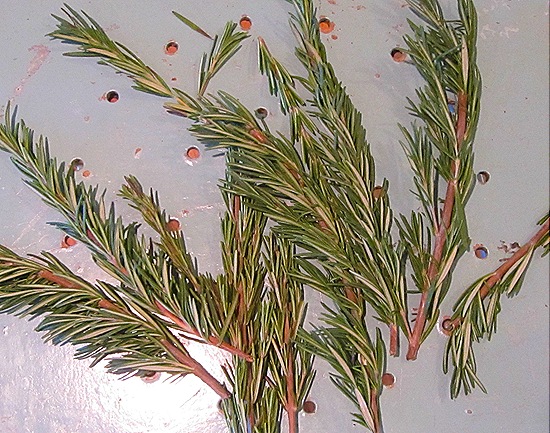
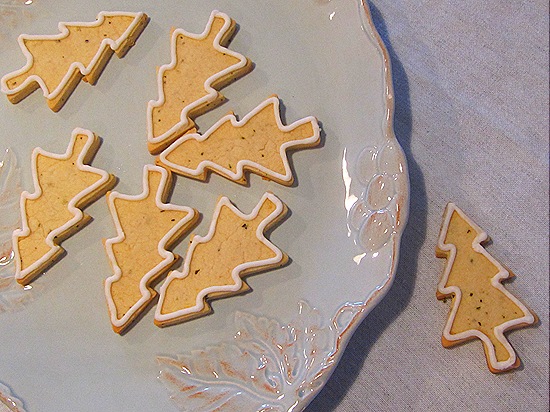
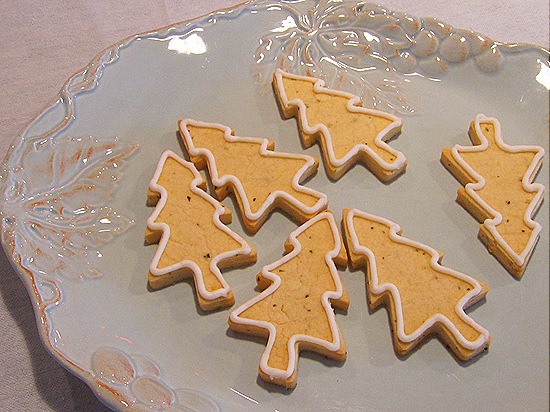
One of the most sophisticated cookies in the bunch, and beautifully made by my friend Daryl, these Rosemary Trees were really elegant, and simply delicious. A crisp cut-out made with finely chopped fresh rosemary and freshly grated lemon zest, their aromatic herbal flavors echoed their pine tree shapes. Really lovely, and a wonderful chic addition to the fun mix.
ELEVEN: Rosemary Trees
Adapted from a recipe of my friend Kate Cole
Makes about 4 dozen 3-inch cookies
For the cookies:
3 ½ cups all-purpose flour
1 tsp salt
2 sticks unsalted butter, room temperature
¾ cup granulated sugar
1 Tbl finely grated lemon zest (from about 1 lemon)\
1 Tbl very finely chopped fresh rosemary
1 large egg
1 tsp pure vanilla For the icing:
1 large egg white
1 ½ cups plus 2 Tbl powdered sugar, more if needed
½ tsp fresh lemon juice To make the cookies: Whisk together the flour and salt in a medium-sized mixing bowl, then set aside. With an electric hand mixer or an electric stand mixer fitted with the paddle attachment, beat the butter and sugar on medium speed until light and fluffy, about 3 minutes. Add the lemon zest and rosemary and mix to combine well. Add the egg and vanilla, then continue to beat until well blended and smooth, about 1 minute more. Reduce the speed to low, and gradually add the flour mixture. Mix only until the dough is just combined, being careful not to over-mix. Divide the dough into two equal portions. Roll out half of the dough between two pieces of parchment paper, to a thickness of 3/16-inch. Slide the dough and parchment to a cookie sheet and refrigerate until firm, about 30 minutes. Repeat with the remaining dough. Pre-heat the oven to 350°F and arrange the racks in the upper and lower thirds of the oven. Line two cookie sheets with parchment paper. Using a 3-inch tall Christmas tree cookie cutter, cut out the cookies and arrange 1-inch apart on the prepared cookie sheets. Press the dough scraps together, roll again, and cut again. (If the dough becomes too soft, refrigerate for a little while.) Repeat re-rolling and re-cutting one more time, and then discard the scraps. When you have available cookie sheets, repeat with the remaining dough. Bake, 2 sheets at a time, until the cookie edges are golden brown, about 10-12 minutes. Be sure to rotate the pans (trading their positions and turning them each 180 degrees) about half-way thorough. Cool the cookies on the pan for about five minutes, then transfer them to a wire rack to cool completely with a metal spatula. To make the icing & frost the cookies: In a medium-sized mixing bowl, whisk together the egg white, sugar and lemon juice. Whisk until smooth. Transfer the icing to a pastry bag with a small round tip. Pipe the icing just inside the edges of the cookie, to simply out-line the rim. If the icing is too thick to pipe, squeeze it back into the bowl and whisk in water, one drop at a time, until it pipes easily but still retains its shape. If it is too thin, whisk in more powdered sugar, 1 teaspoon at a time. Allow the cookies to rest for about 30 minutes to 1 hour, to allow the icing to harden. Then store the cookies in an air-tight container in the refrigerator for up to 3 days.
 |
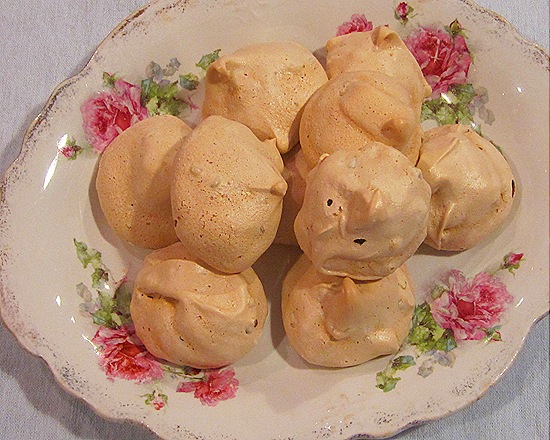
And finally, cookie number twelve, the Espresso Chip Meringues. Along with the Orange Poppy Seed Cookies and the Rosemary Trees, the recipe for these sugary, chocolate dotted clouds came from my chef friend Katie in New York. And I passed the recipe on to my friend Jaime, an aspiring pastry chef herself, who did an incredible job making these wondrous meringues. Crisp with a delicate crunch, which transforms in a few bites to a tender chew. Deep espresso flavor with a smooth current of rich vanilla and tiny specks of chocolate scattered throughout. Absolutely divine, they created quite a buzz among all the bakers. (And I don’t think that had anything to do with the espresso! )
TWELVE: Espresso Chip Meringues
Adapted from a recipe by Giada DeLaurentis, by way of my friend Katie Cole
Makes 2 dozen meringues
 3 large egg whites, room temperature Pinch of salt ¾ cup superfine sugar 1/8 tsp cream of tartar ¼ tsp vanilla extract 2 tsp instant espresso powder 2/3 cup mini semi-sweet chocolate chips Pre-heat the oven to 300°F and arrange the racks in the upper and lower thirds of the oven. Line 2 baking sheets with parchment paper, and set aside. Combine the egg whites and salt in the bowl of an electric stand mixer fitted with a whisk attachment. Beat on medium-low speed until frothy, about 1 minute. Increase the speed to medium-high, then gradually add the sugar, about 1 tablespoon at a time. Add the cream of tartar, vanilla extract and espresso powder. Increase the speed to high and beat until the mixture is thick and holds stiff peaks, about 3 to 5 minutes. (‘Stiff peaks’ means that when you remove the whisk from the eggs, a point should form and not fall down.) Using a rubber spatula, fold in the mini chocolate chips Drop dollops of the mixture, about 2 tablespoons or less per scoop, onto the parchment-lined baking sheet, spacing them 2-inches apart. You should get about 24 scoops per recipe. Bake for 30 minutes, then rotate the pans (trading their positions and turning them each 180 degrees) and bake until lightly golden brown, about another 30 minutes. Turn and rotate the pans again, then turn off the oven. Allow the meringues to cool while still in the oven, about 2 hours. Remove from the oven and let cool completely. Store at room temperature in a completely air-tight container for up to 3 days. |

